

Qu’est-ce qu’un conteneur ?
Un CONTENEUR logiciel est un ensemble de logiciels qui contient tous les éléments nécessaires pour s'exécuter dans n'importe quel environnement. De cette manière, les conteneurs virtualisent le système d'exploitation et s'exécutent n'importe où, que ce soit dans un centre de données privé, sur le cloud public ou même sur l'ordinateur portable d'un développeur. (source : GOOGLE)
Un conteneur est une unité standard de logiciel qui regroupe le code et toutes ses dépendances afin que l'application s'exécute rapidement et de manière fiable sur n'importe quel ordinateur. (source : DOCKER)
Qu’est-ce qu’une jail ? 3 niveaux…. au moins
Une JAIL est un ensemble de répertoires que vous créez au sein de votre système de fichiers ; l'utilisateur ne peut voir aucun répertoire ni fichier en dehors du répertoire de la prison. L’utilisateur est enfermé dans ce répertoire et ses sous-répertoires.(From https://linux.die.net/man/8/jailkit)
Une CHROOT JAIL est utilisé pour créer un environnement restreint (sandbox) pour l'exécution d'un processus. Cela signifie qu'un processus ne peut pas malicieusement altérer des données en dehors de l'arborescence de répertoires prescrite.. (https://phoenixnap.com/kb/chroot-jail) https://help.ubuntu.com/community/BasicChroot
Une autre utilisation des prisons chroot est en tant que substitut aux machines virtuelles. Cette méthode est appelée virtualisation au niveau du kernel et nécessite moins de ressources que les machines virtuelles. Cette opération permet aux utilisateurs de créer plusieurs instances isolées sur le même système. (https://phoenixnap.com/kb/chroot-jail)
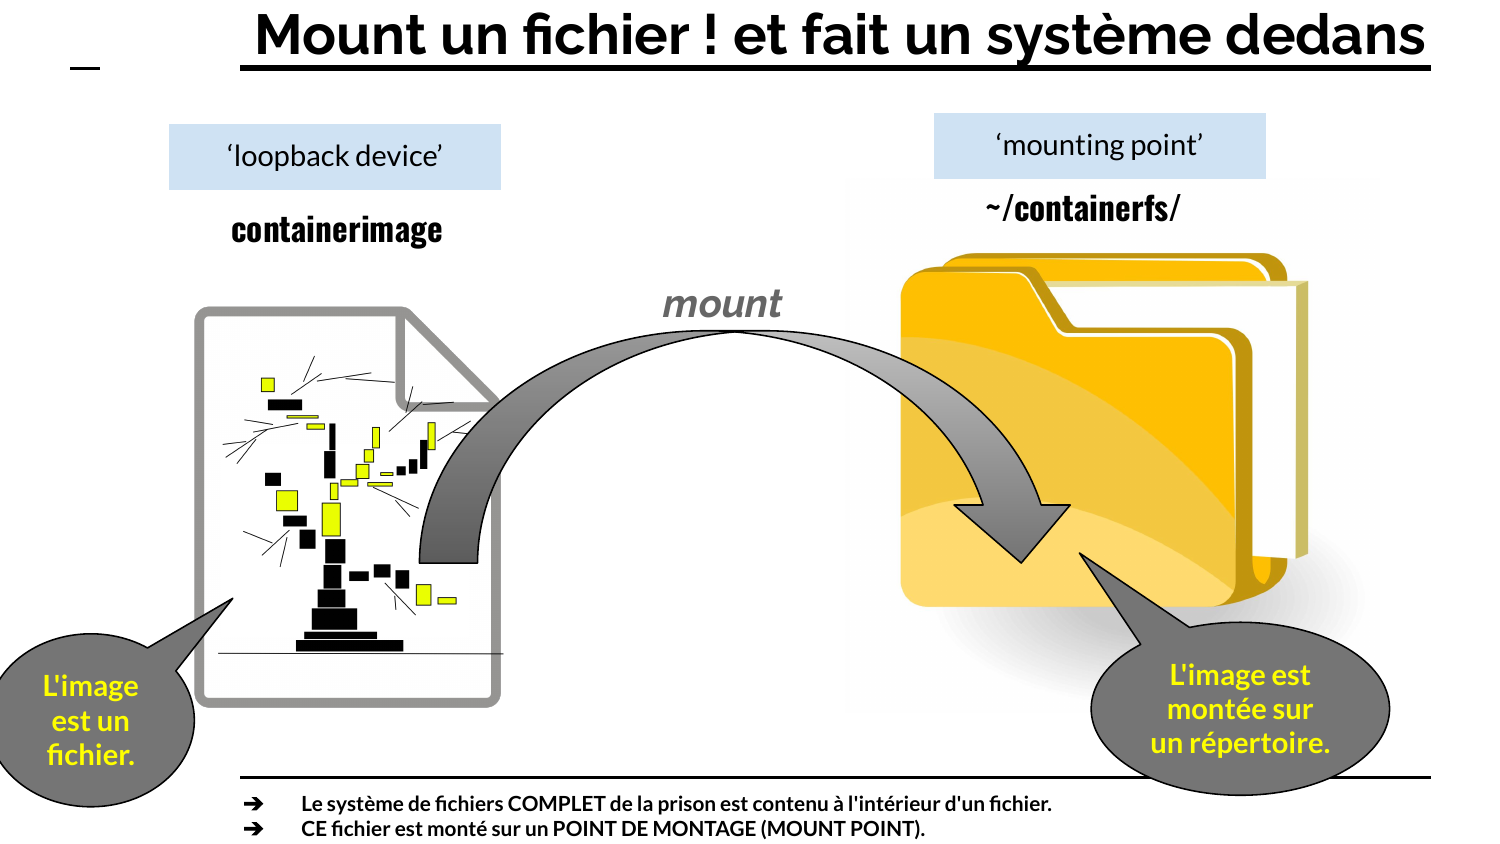
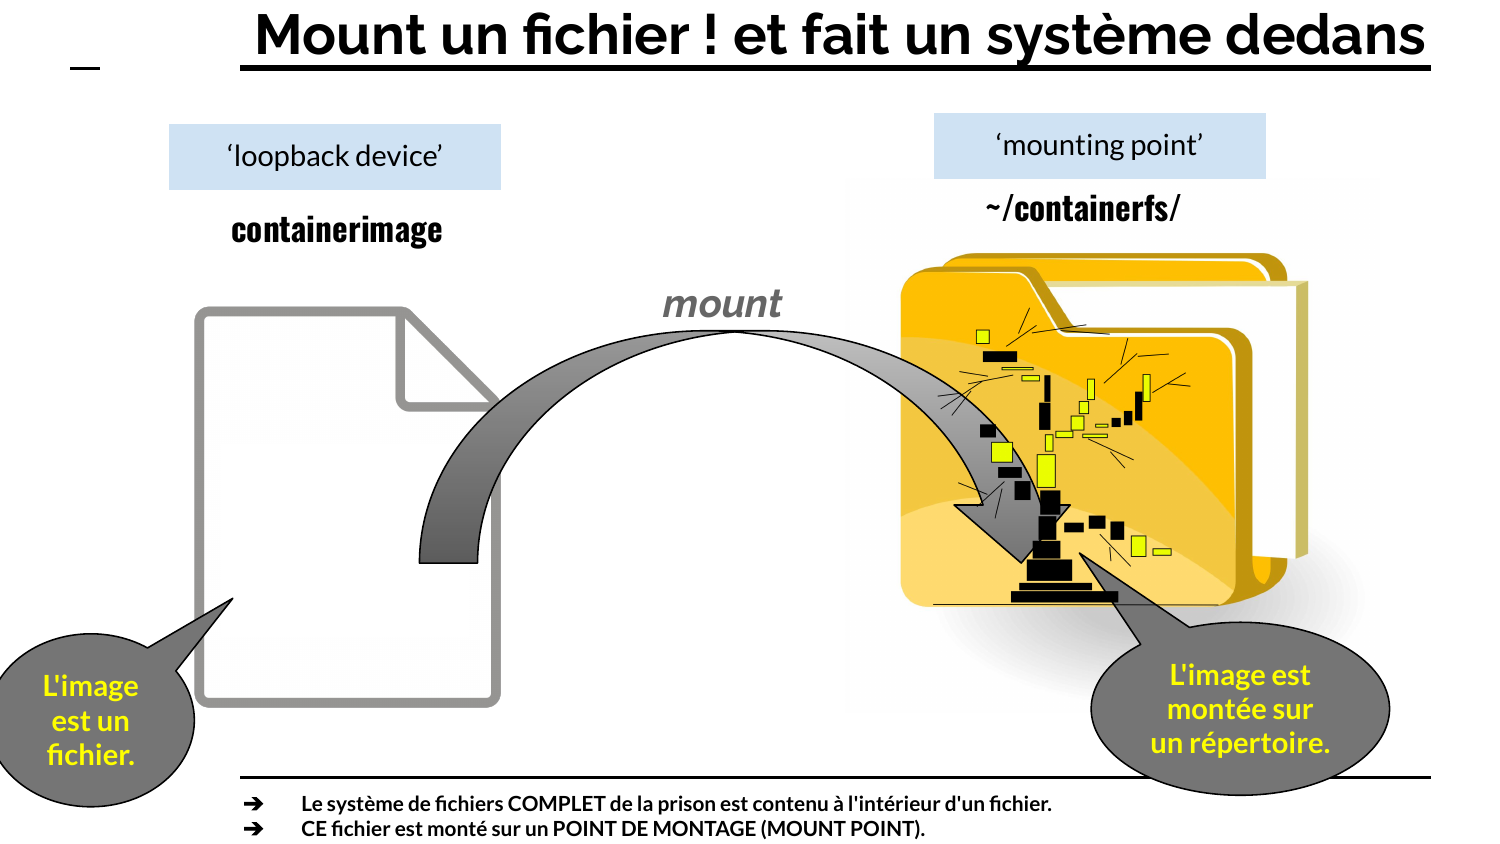
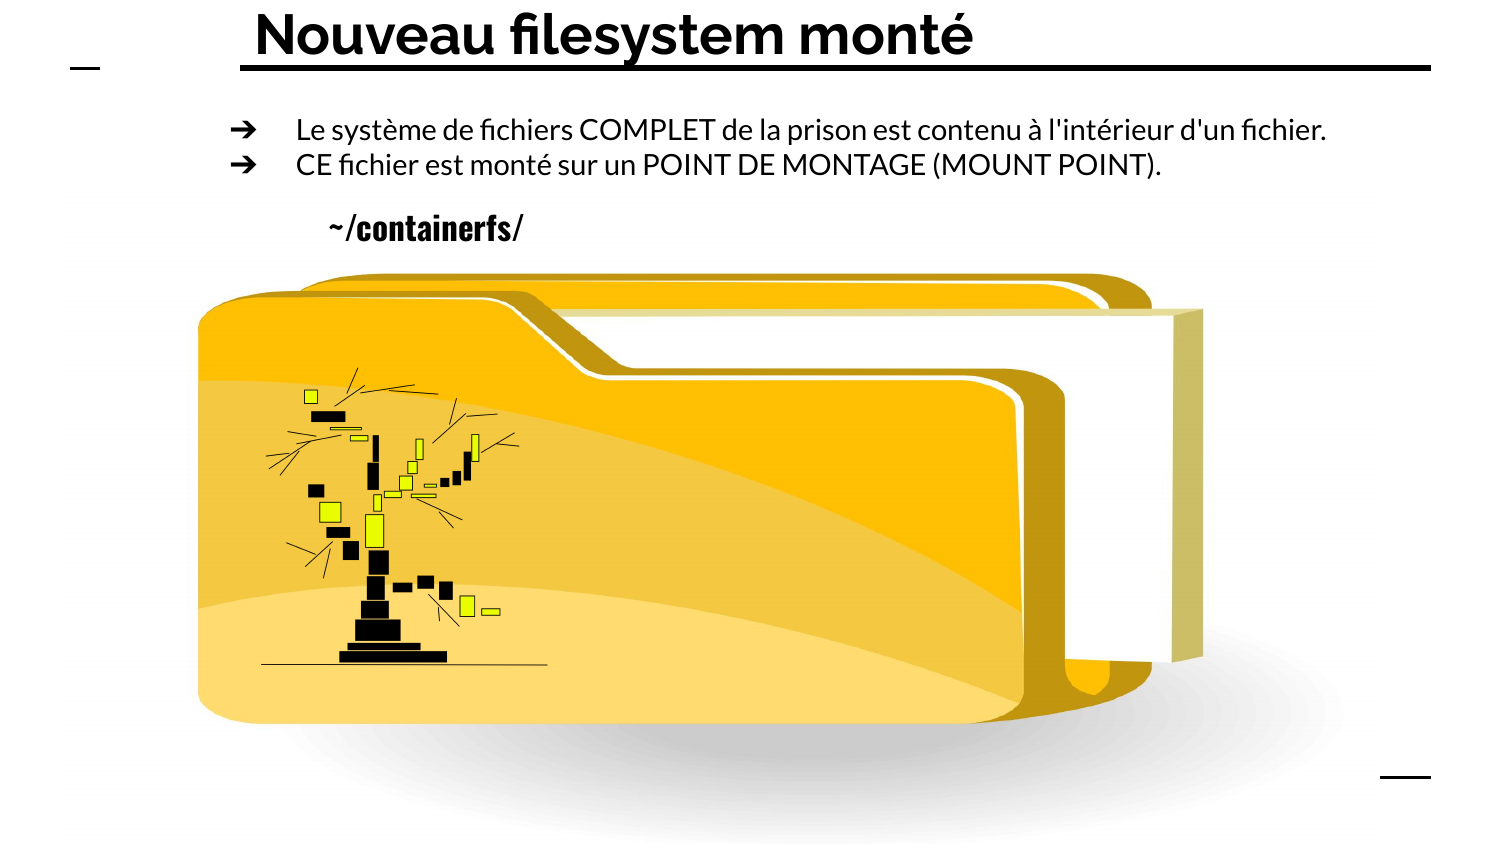
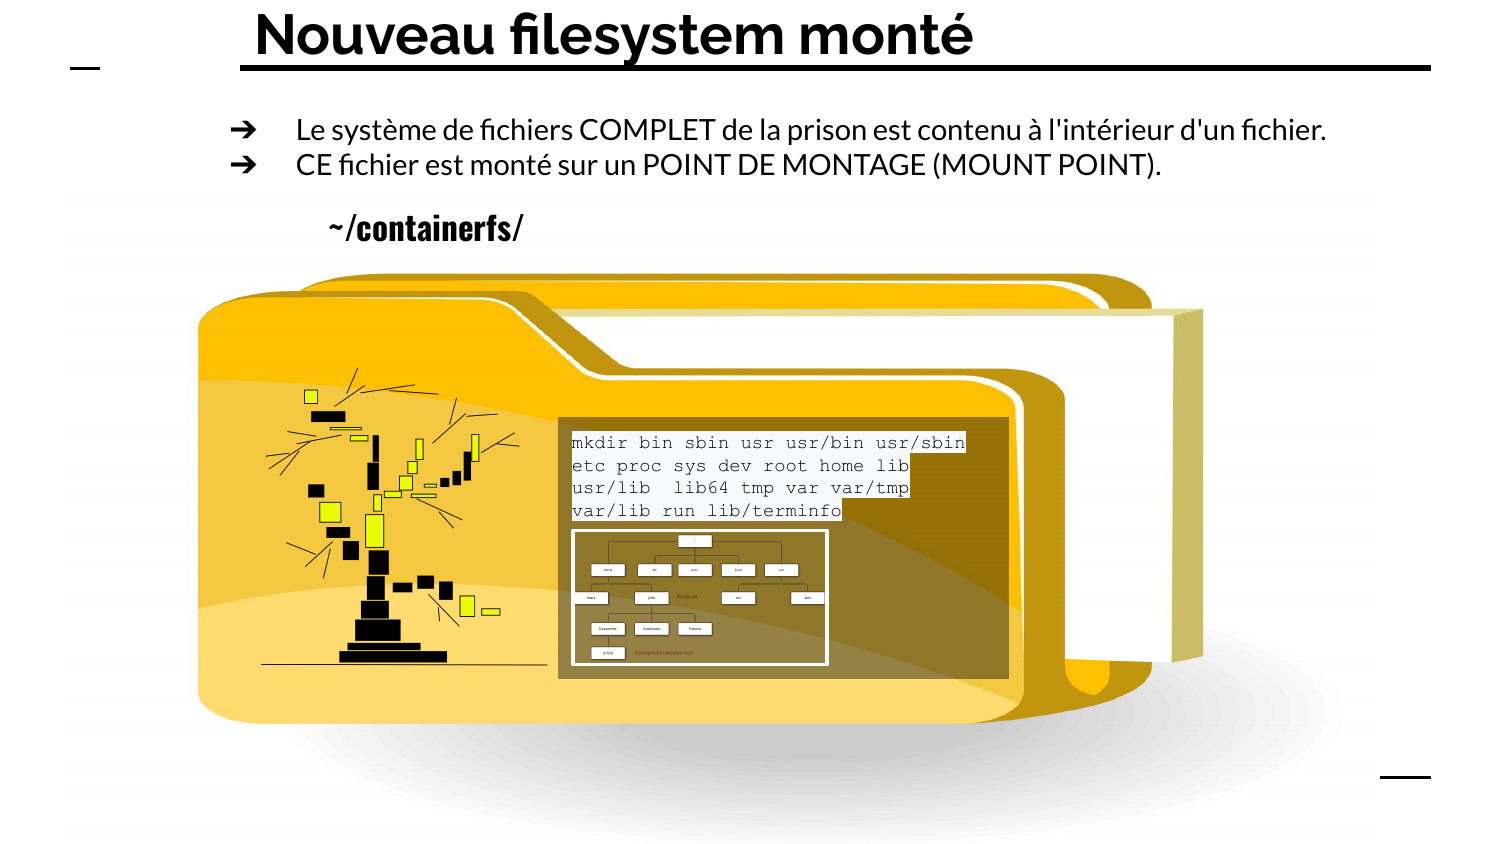

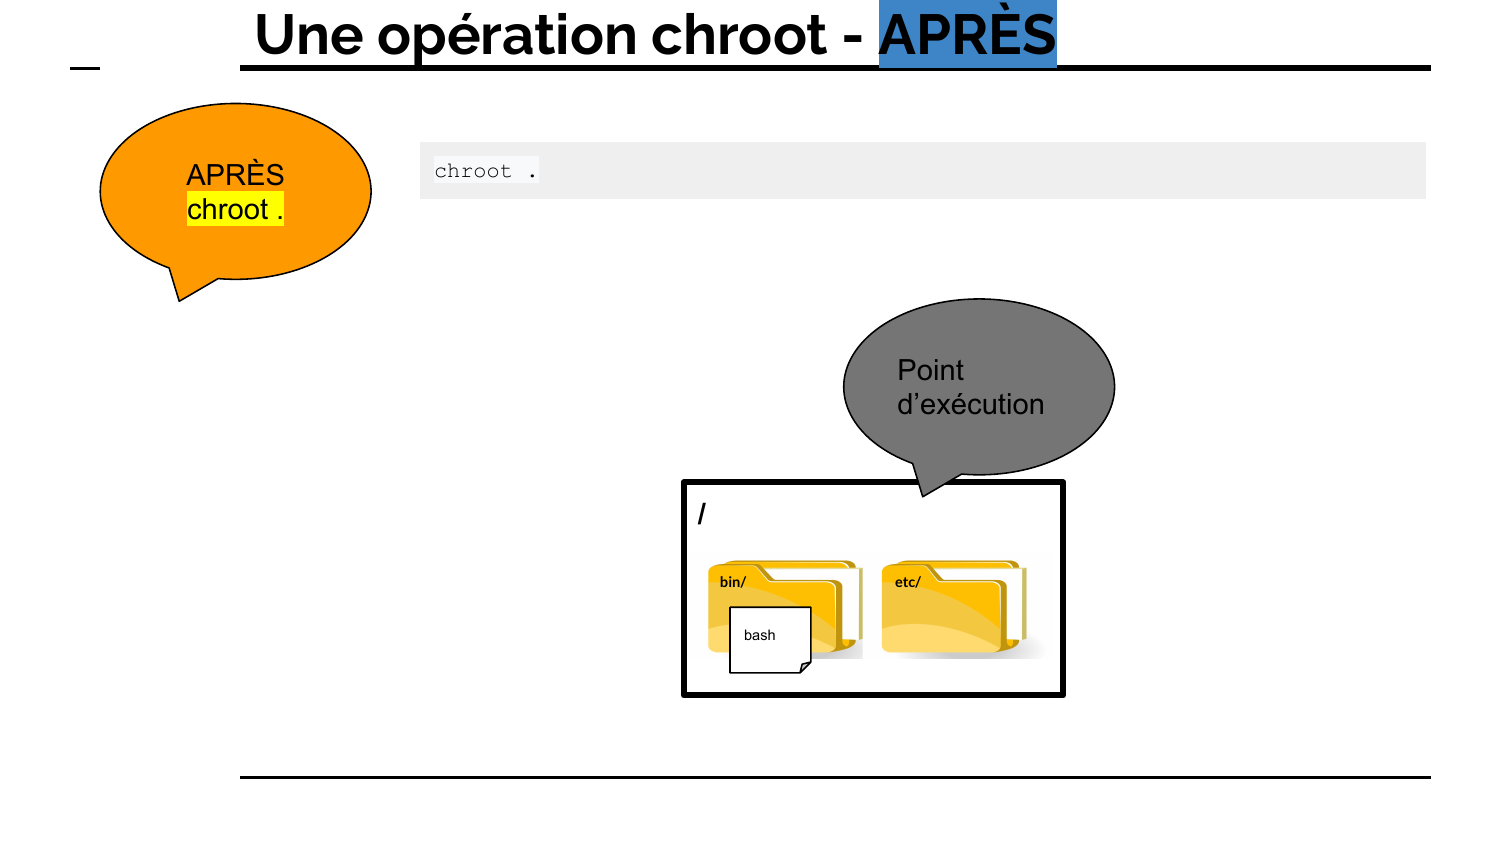
UN CONTENEURENTIER
W
Un nouveau petit monde !
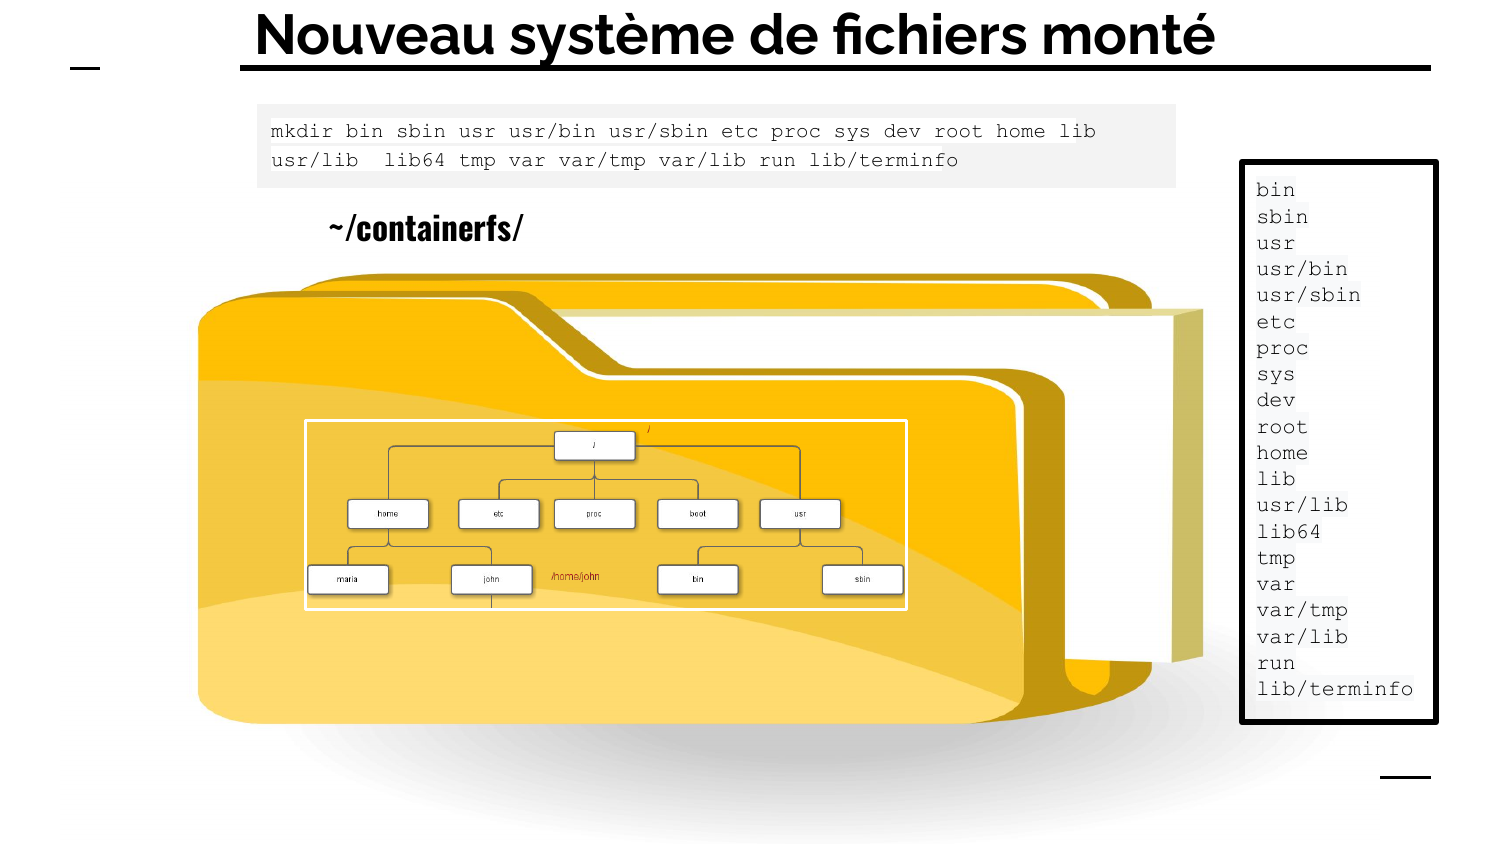
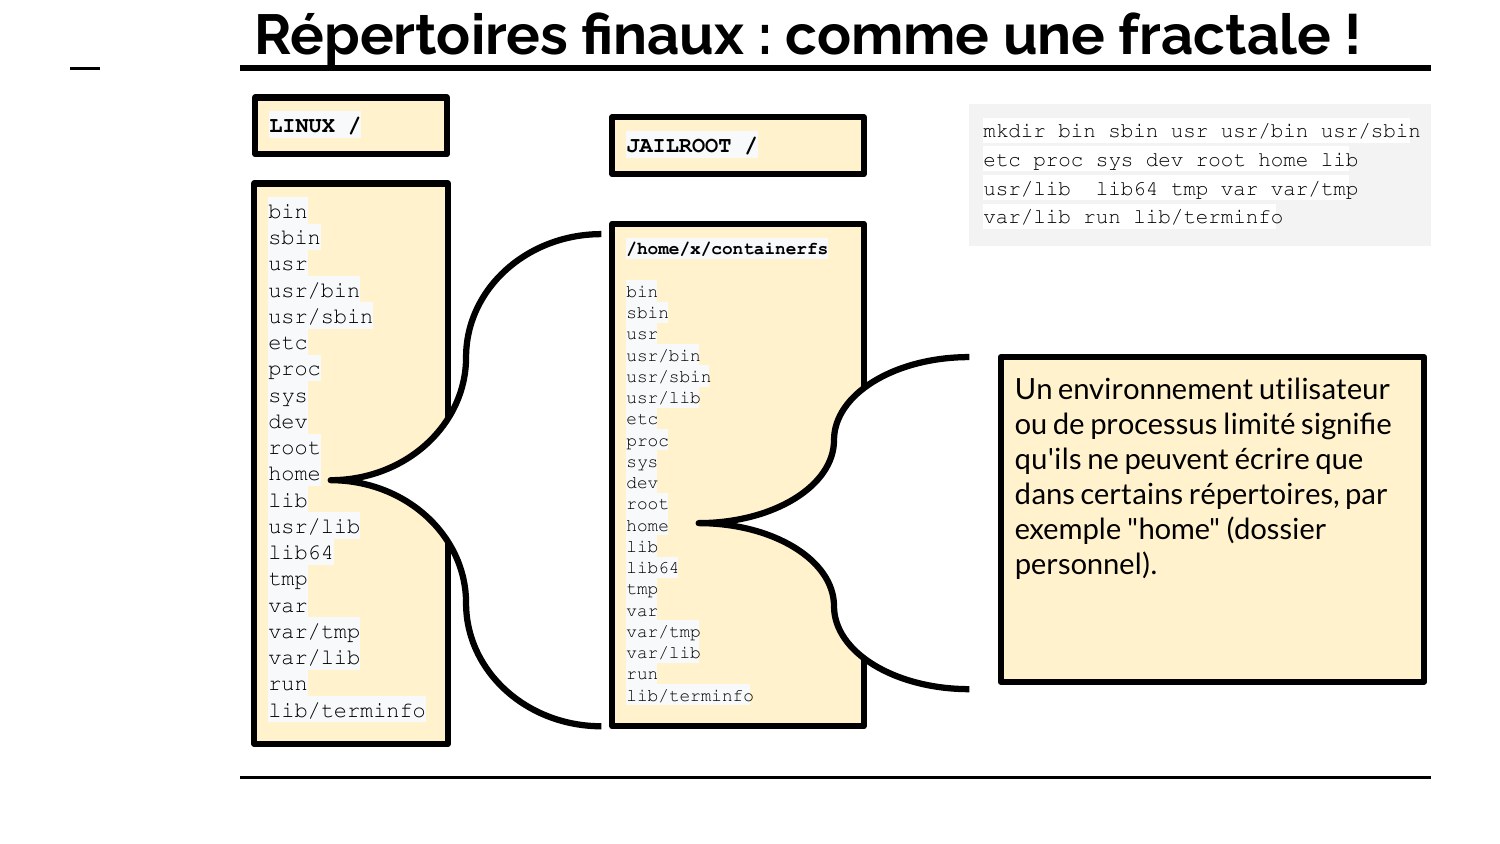
Places à créer pour notre ‘little world’
Cela dépend toujours de ce que nous voulons finalement faire avec le conteneur.
Dirs
Nous avons besoin des répertoires pour nos exécutables et leurs bibliothèques, y compris le shell et le linker.
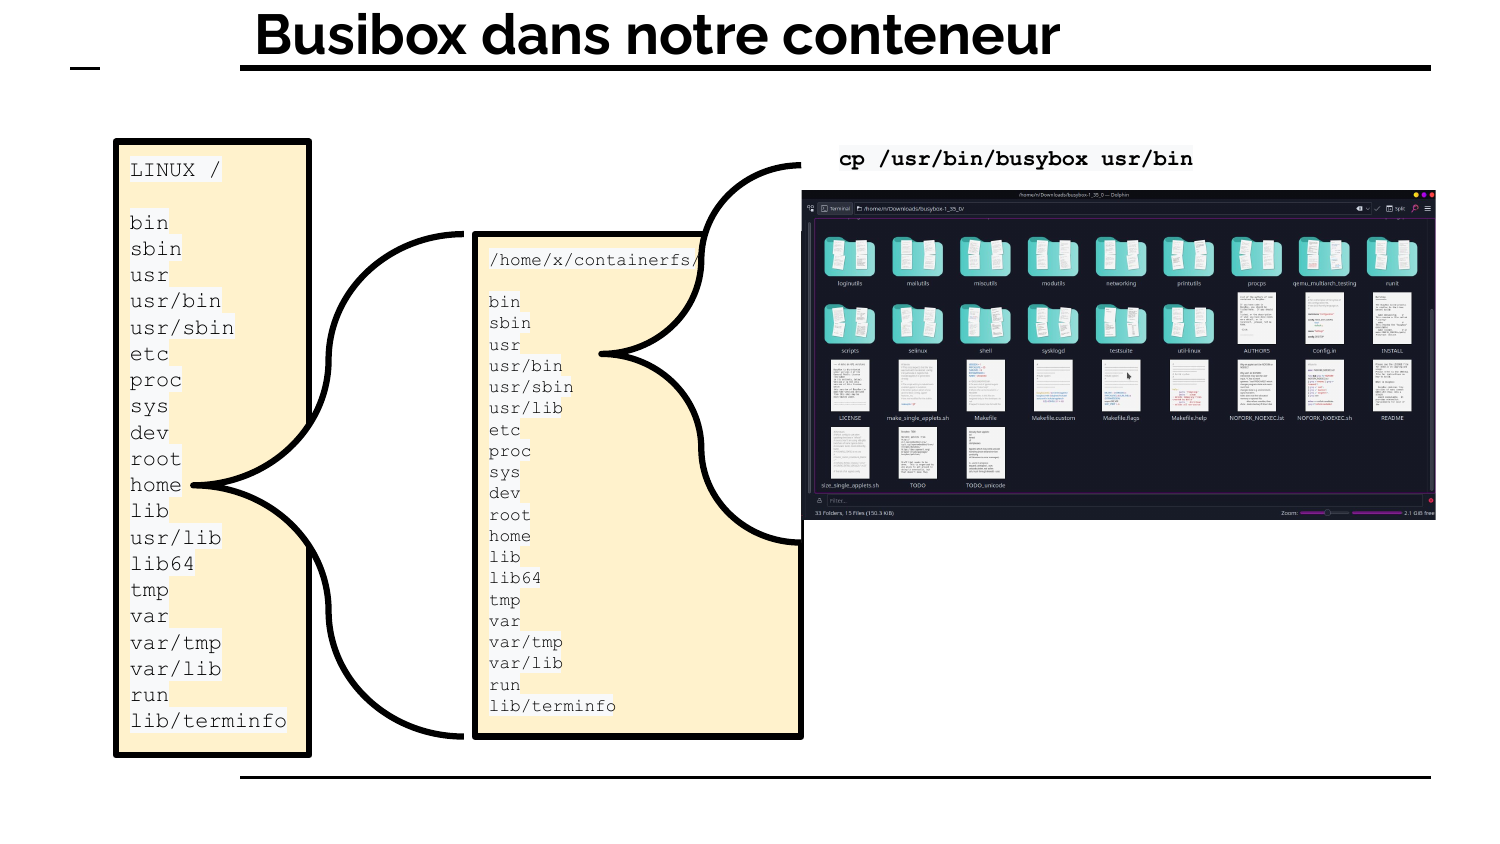
bin sbin usr usr/bin usr/sbin lib usr/lib lib64 var/lib sys
Chaque exécutable peut avoir besoin de consulter le répertoire /etc et d'autres répertoires contenant des informations pour son propre fonctionnement.
etc proc lib/terminfo dev
Ou d'écrire dans /tmp, /run ou /var/quelque_chose.
tmp run var var/tmp
Les fichiers des utilisateurs doivent être accessibles par les utilisateurs et écrits par certains exécutables logiciels.
root home
Files
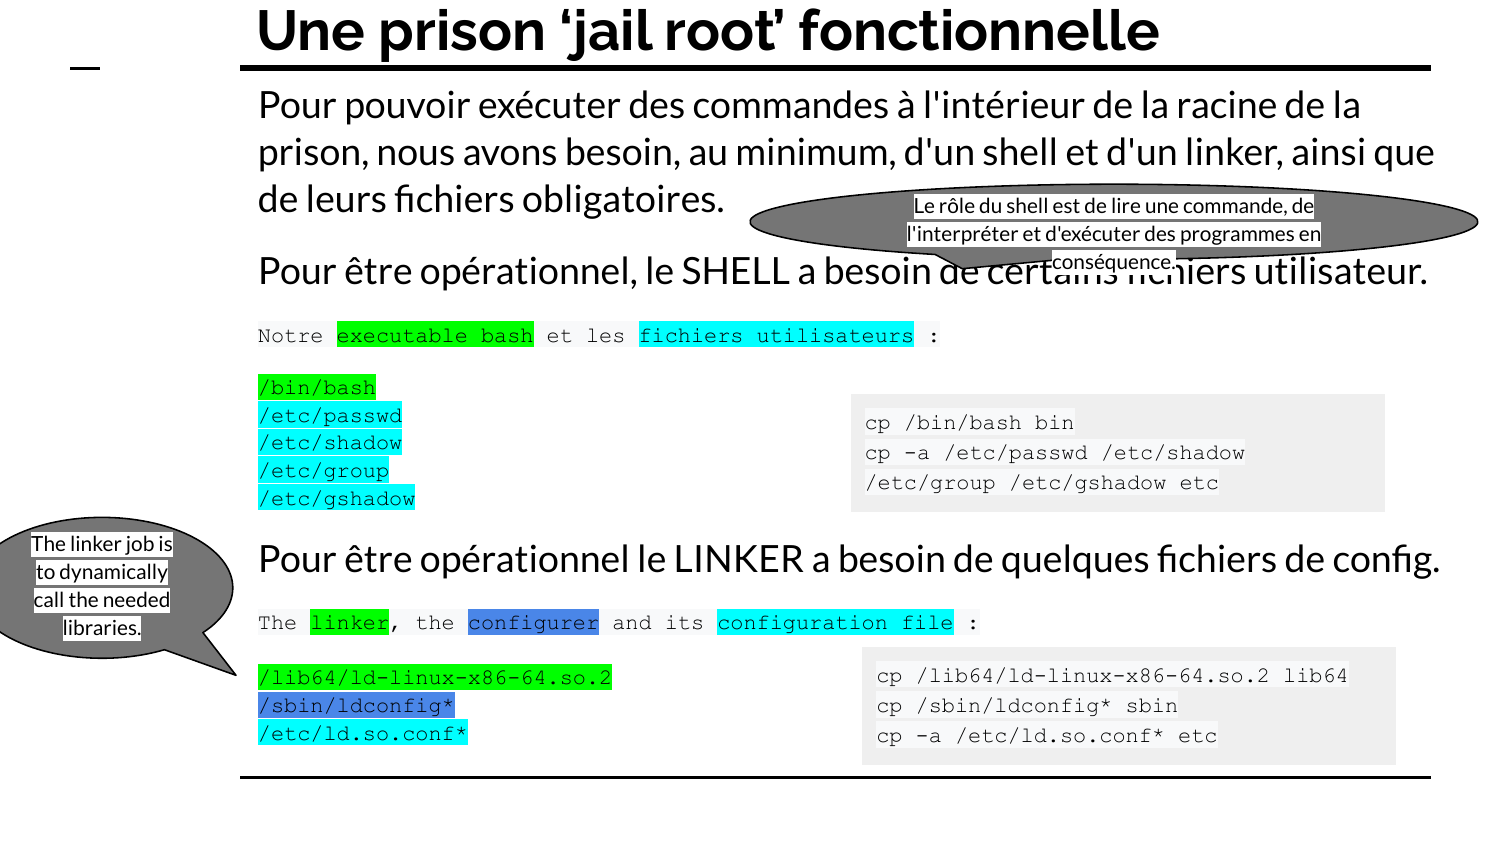
Les fichiers de configuration nécessaires dépendent beaucoup de ce que le conteneur est censé faire.
Si vous recommencez seulement
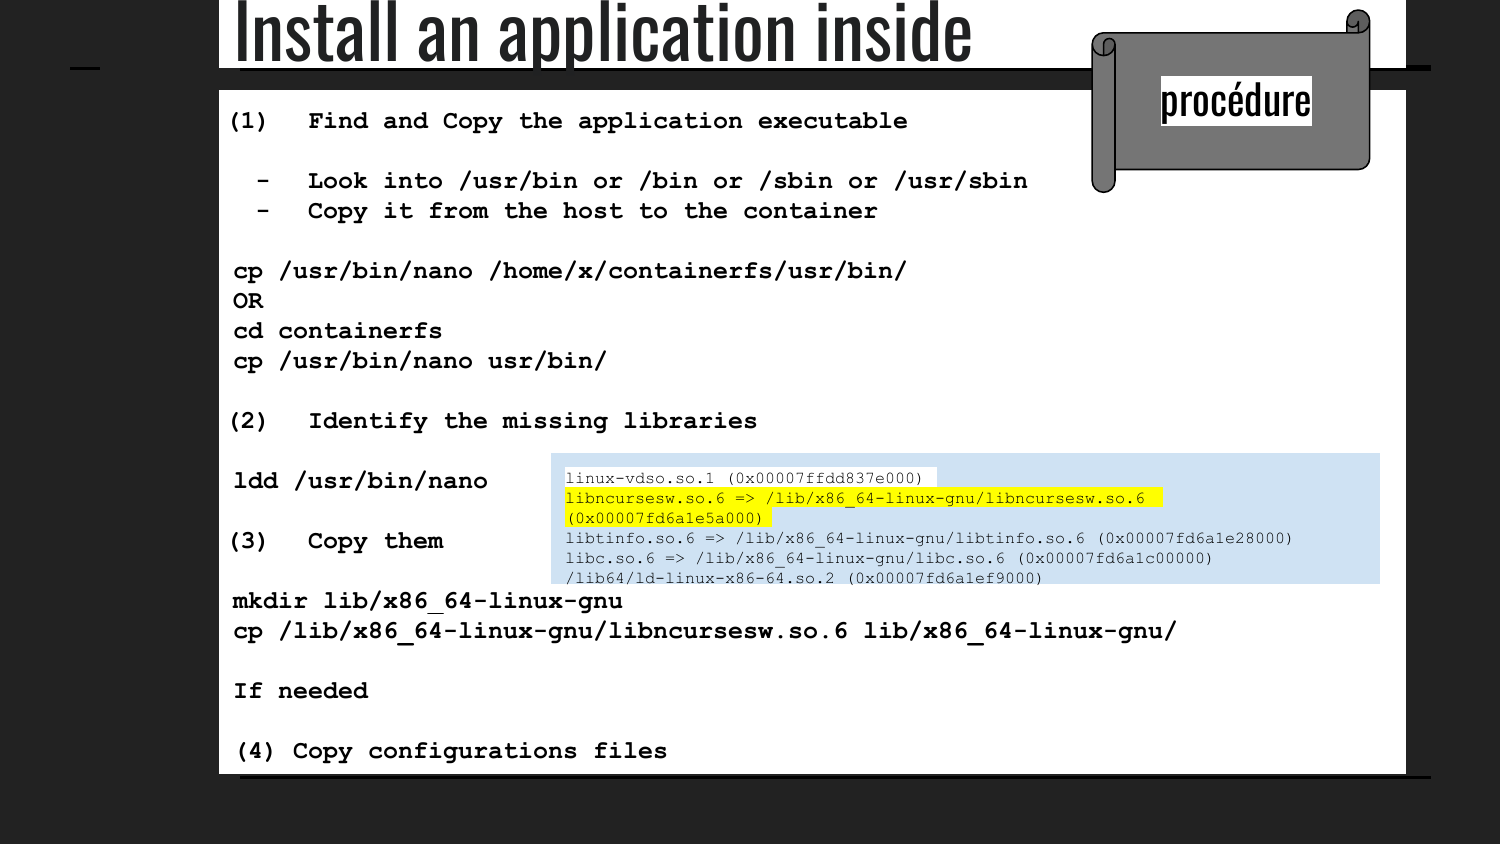
MOUNTPOINT='conteneurfs'
cd
sudo umount -q $MOUNTPOINT/dev
sudo umount -q $MOUNTPOINT
rm -rf $MOUNTPOINT
Essayez les commandes …
cd
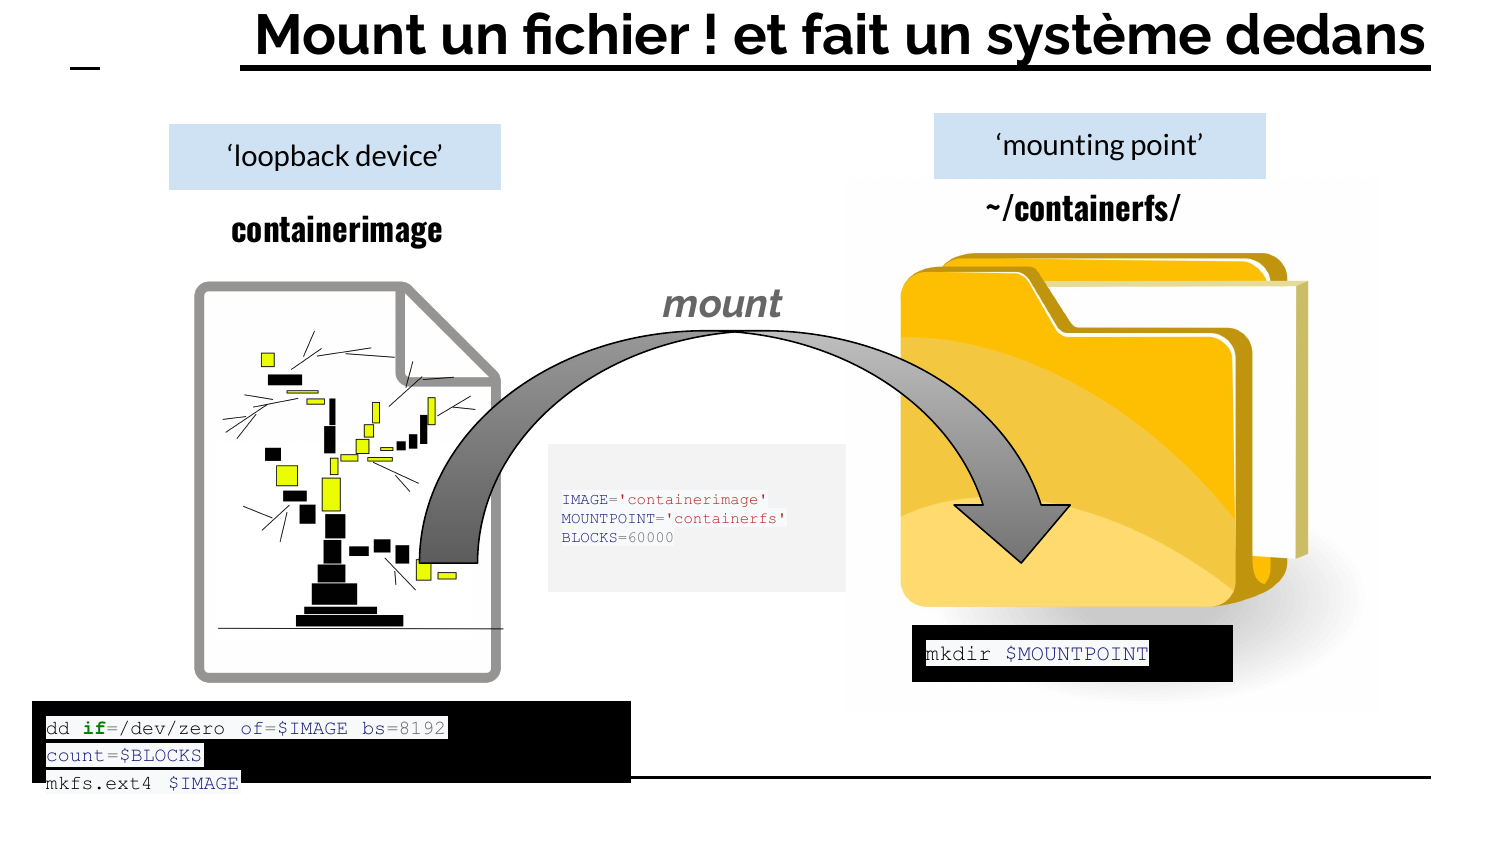
MOUNTPOINT='conteneurfs'
IMAGE='conteneurimage'
BLOCKS=100000
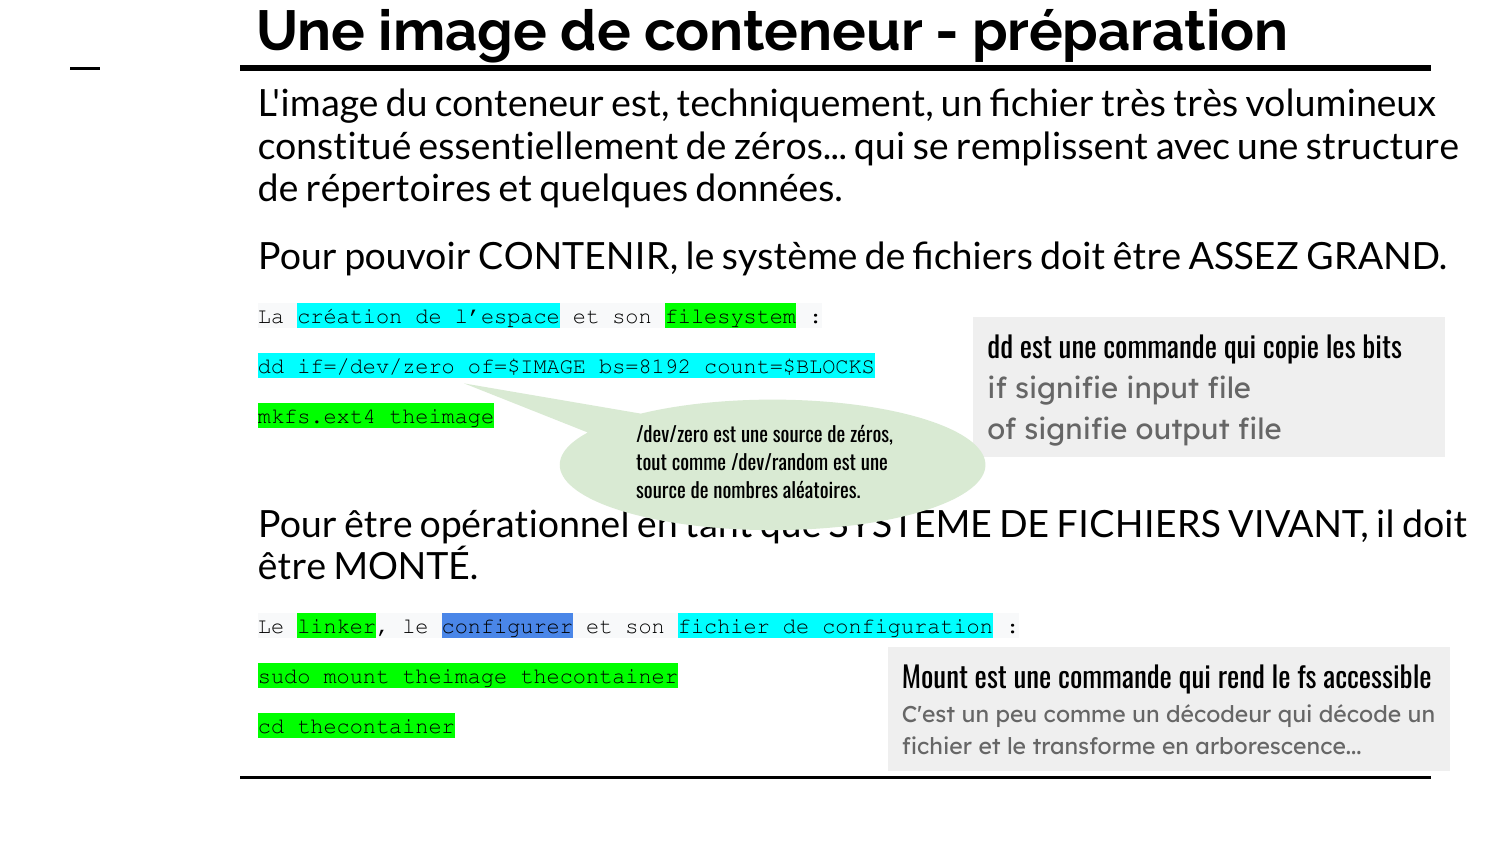
dd if=/dev/zero of=$IMAGE bs=8192 count=$BLOCKS
mkfs.ext4 $IMAGE
mkdir $MOUNTPOINT
sudo mount $IMAGE $MOUNTPOINT
cd $MOUNTPOINT
sudo mkdir bin sbin usr usr/bin usr/sbin etc proc sys dev root home lib \usr/lib lib64 tmp var var/tmp var/lib run lib/terminfo
sudo chmod 1777 tmp var/tmp

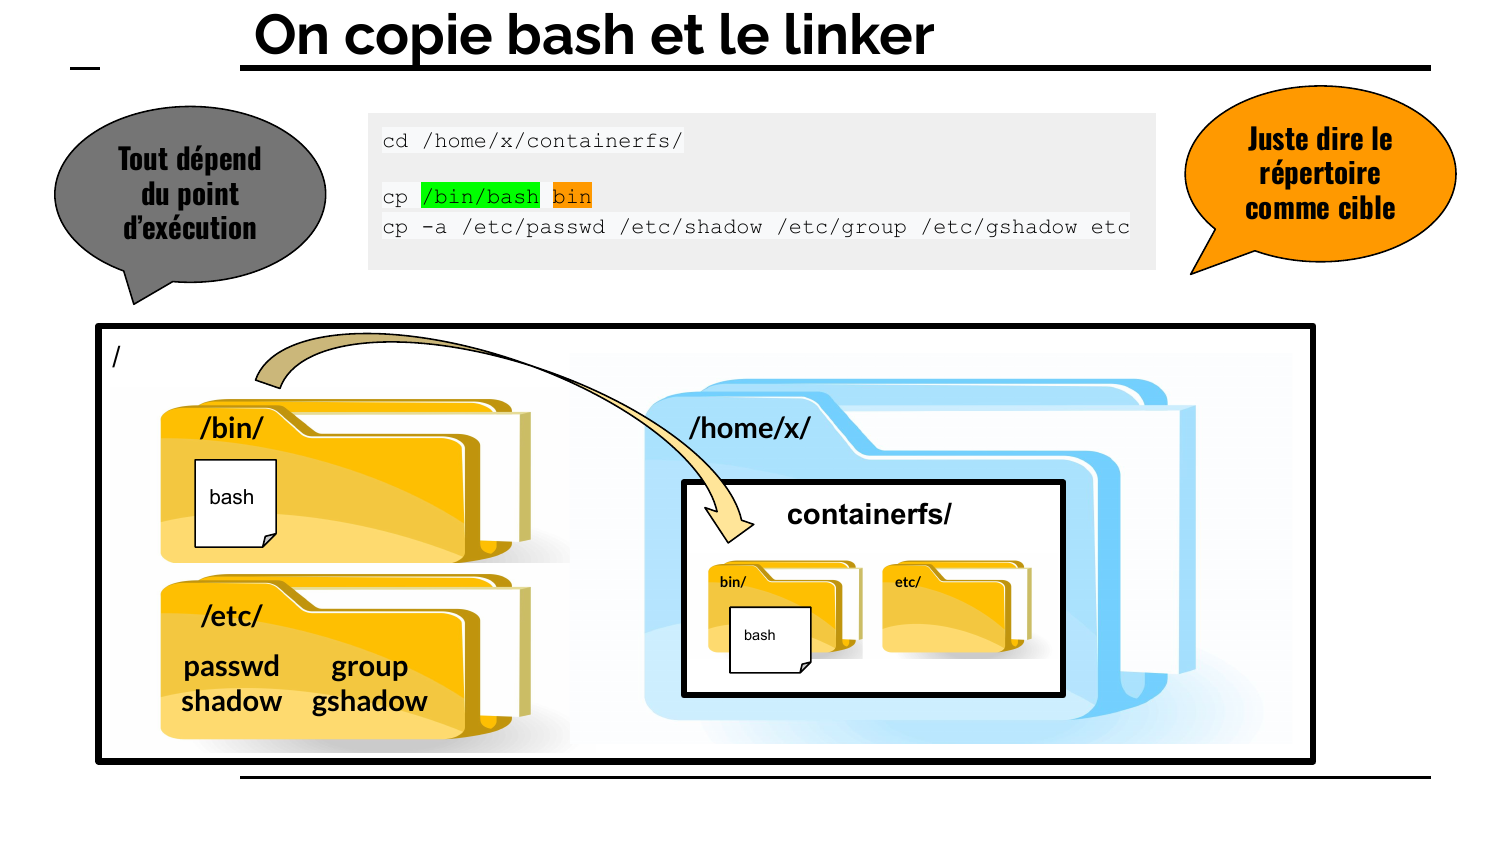
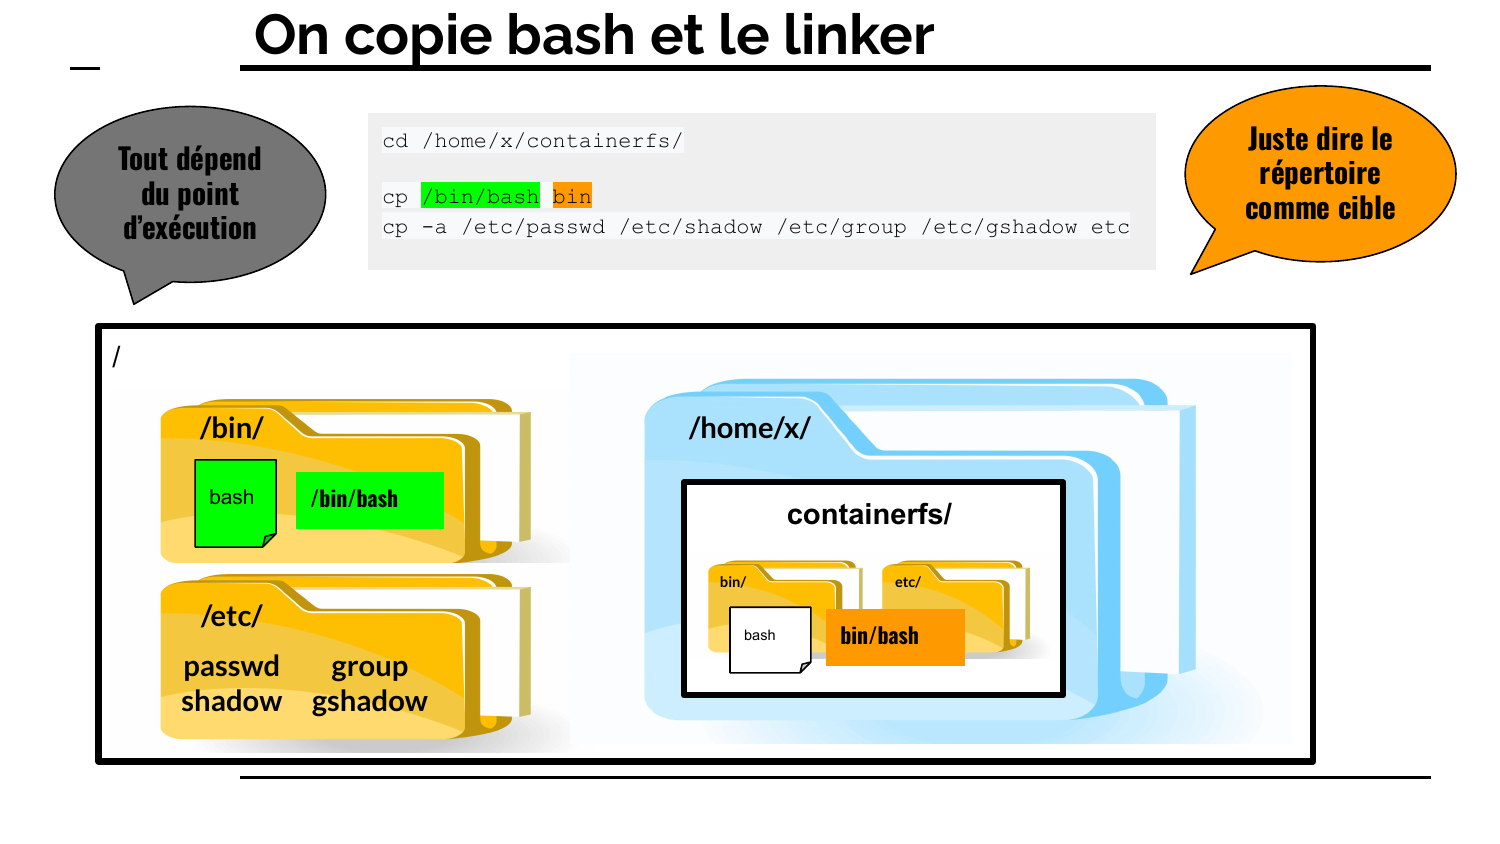
Essayez les commandes …
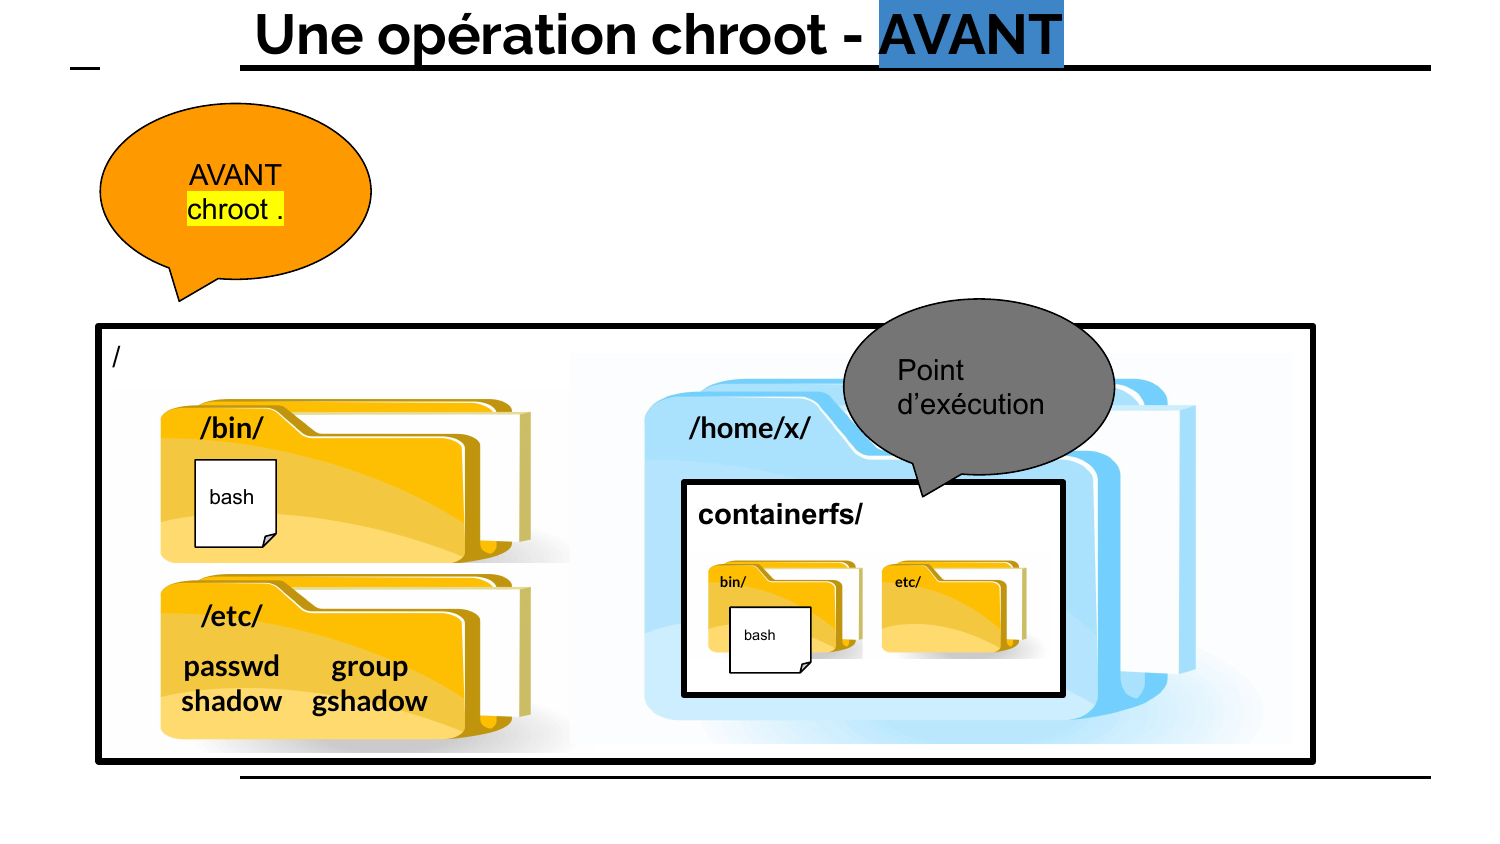
sudo cp /bin/bash binsudo cp -a /etc/passwd /etc/shadow /etc/group /etc/gshadow etc
sudo cp /lib64/ld-linux-x86-64.so.2 lib64sudo cp /sbin/ldconfig* sbinsudo cp -a /etc/ld.so.conf* etc

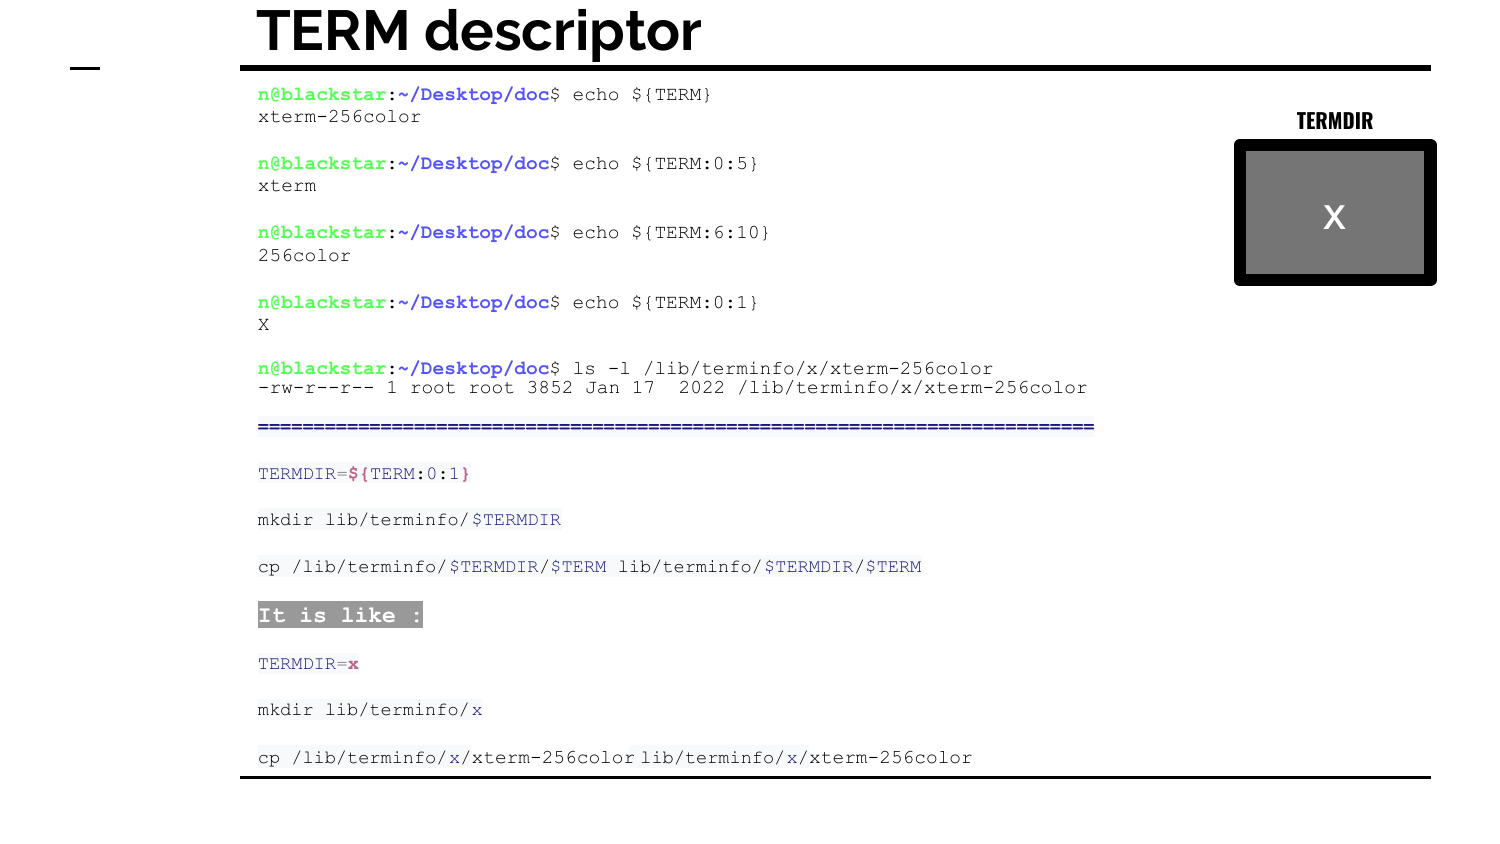
Essayez les commandes …
#TERMDIR=${TERM:0:1}
#sudo cp /lib/terminfo/$TERMDIR/$TERM lib/terminfo/$TERMDIR/$TERM
TERMDIR="x"
TERMSOFT="xterm"
sudo mkdir lib/terminfo
sudo mkdir lib/terminfo/$TERMDIR
sudo cp /lib/terminfo/$TERMDIR/$TERM lib/terminfo/$TERMDIR/$TERMSOFT

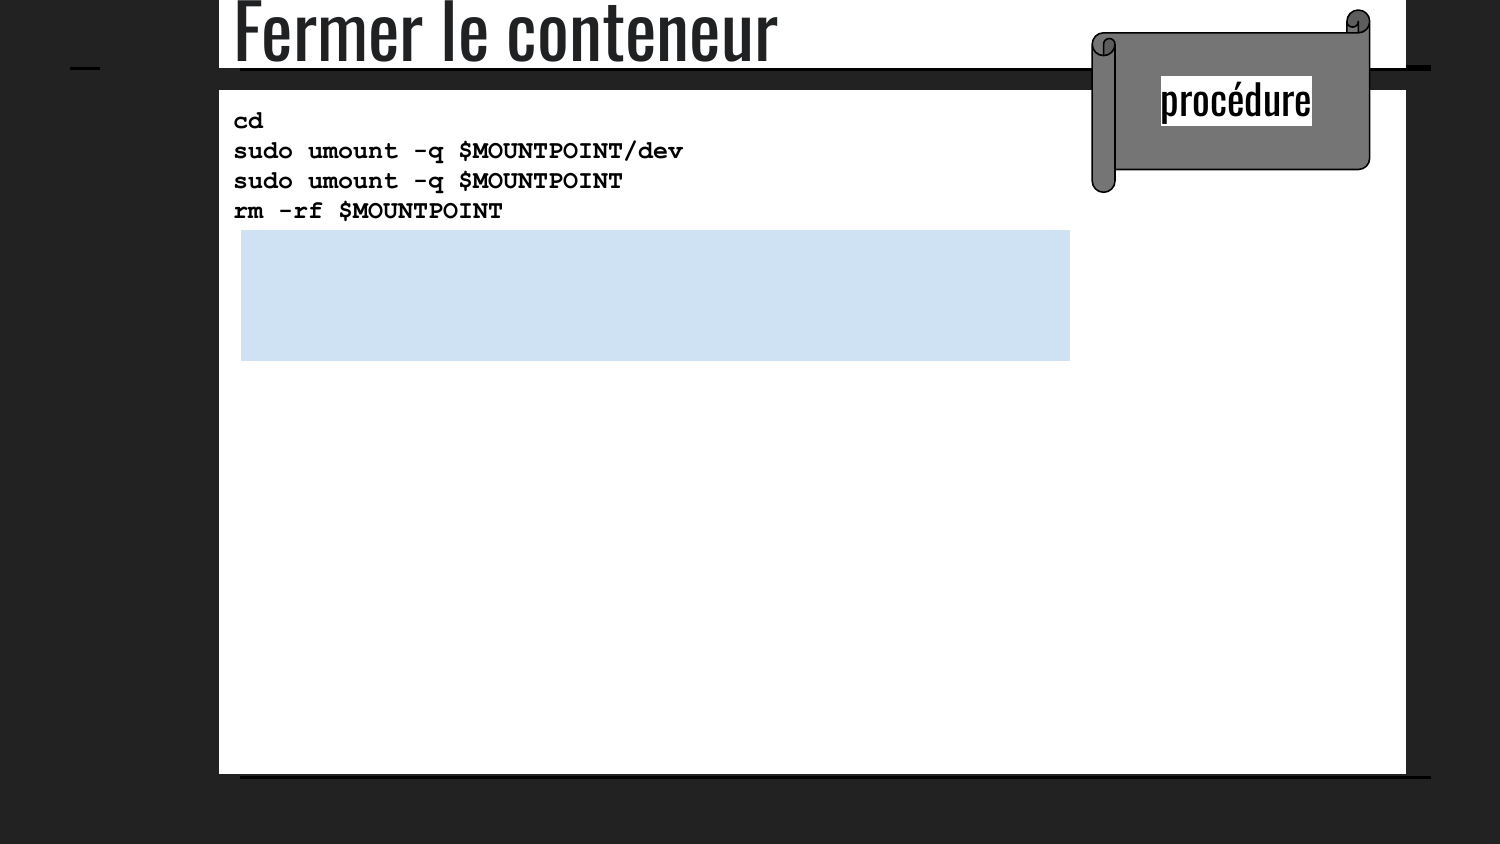
ÉTAPES pour apporter les commandes dans le CONTENEUR
(1) Quitter le chroot du conteneur tout en le maintenant monté.
(2) Copier la commande actuelle depuis /usr/bin ou un autre répertoire bin vers le conteneur.
(3) Exécuter la commande ldd sur l'exécutable.
(4) Copier uniquement les bibliothèques manquantes dans le même emplacement à l'intérieur du conteneur.
(5) TESTER.
Rechercher les dépendances d’un exe
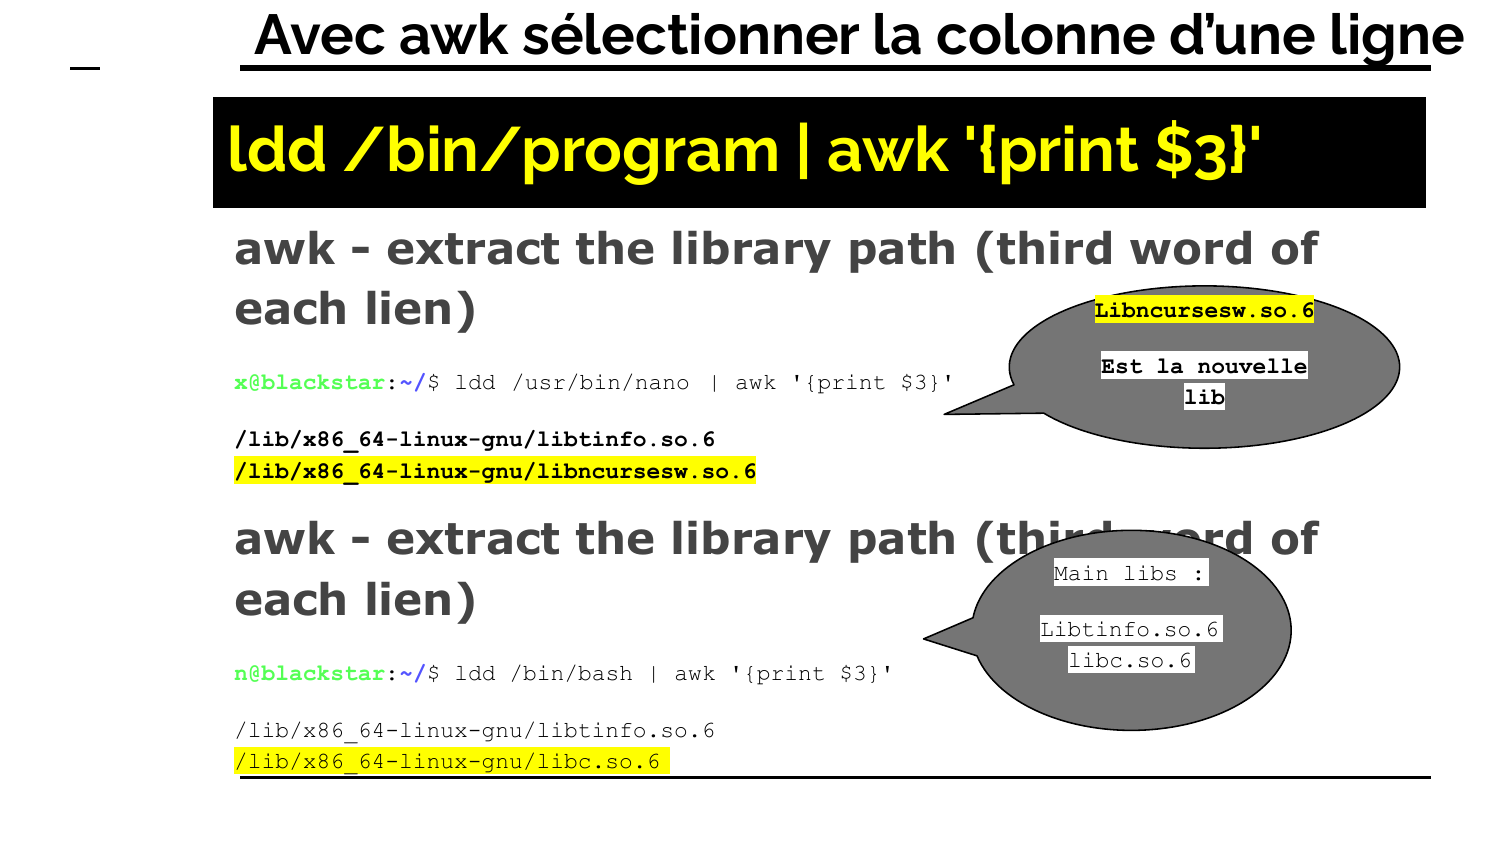
ldd /usr/bin/theprogram
ldd - print shared library dependencies
x@blackstar:~$ ldd /usr/bin/nano
linux-vdso.so.1 (0x00007ffe7cbe4000)libncursesw.so.6 => /lib/x86_64-linux-gnu/libncursesw.so.6 (0x00007f00522cc000)libtinfo.so.6 => /lib/x86_64-linux-gnu/libtinfo.so.6 (0x00007f005229a000)libc.so.6 => /lib/x86_64-linux-gnu/libc.so.6 (0x00007f0052000000)/lib64/ld-linux-x86-64.so.2 (0x00007f0052365000)
ldd - print shared library dependencies
n@blackstar:~/Downloads/busybox-1_35_0$ ldd /bin/bash
linux-vdso.so.1 (0x00007ffd25ffd000)libtinfo.so.6 => /lib/x86_64-linux-gnu/libtinfo.so.6 (0x00007fde5d952000)libc.so.6 => /lib/x86_64-linux-gnu/libc.so.6 (0x00007fde5d72a000)/lib64/ld-linux-x86-64.so.2 (0x00007fde5db01000)
Essayez les commandes …
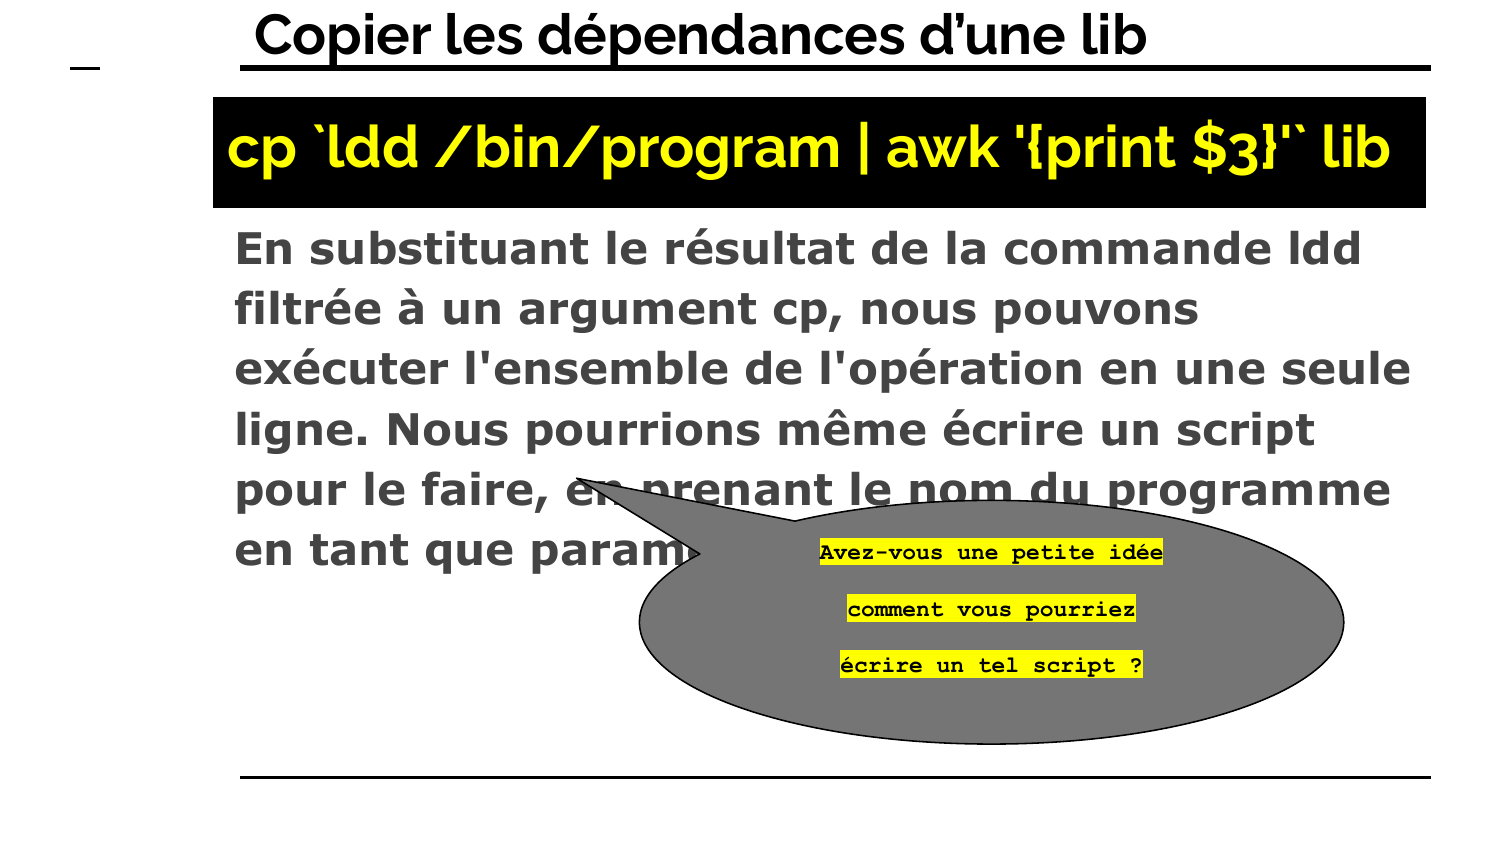
sudo cp `ldd /bin/bash | awk '{print $3}'` lib
sudo cp /usr/bin/nano usr/bin
sudo cp `ldd /usr/bin/nano | awk '{print $3}'` lib
Copier un exécutable et ses dépendances
cp `ldd /bin/bash | awk '{print $3}'` lib
ldd - print shared library dependencies
n@blackstar:~/Downloads/busybox-1_35_0$ ldd /bin/bash
linux-vdso.so.1 (0x00007ffd25ffd000)libtinfo.so.6 => /lib/x86_64-linux-gnu/libtinfo.so.6 (0x00007fde5d952000)libc.so.6 => /lib/x86_64-linux-gnu/libc.so.6 (0x00007fde5d72a000)/lib64/ld-linux-x86-64.so.2 (0x00007fde5db01000)
awk - extract the library path (third word of each lien)
n@blackstar:~/$ ldd /bin/bash | awk '{print $3}'
/lib/x86_64-linux-gnu/libtinfo.so.6/lib/x86_64-linux-gnu/libc.so.6
Copier un exécutable et ses dépendances
cp `ldd /usr/bin/nano | awk '{print $3}'` lib
ldd - print shared library dependencies
x@blackstar:~$ ldd /usr/bin/nano
linux-vdso.so.1 (0x00007ffe7cbe4000)libncursesw.so.6 => /lib/x86_64-linux-gnu/libncursesw.so.6 (0x00007f00522cc000)libtinfo.so.6 => /lib/x86_64-linux-gnu/libtinfo.so.6 (0x00007f005229a000)libc.so.6 => /lib/x86_64-linux-gnu/libc.so.6 (0x00007f0052000000)/lib64/ld-linux-x86-64.so.2 (0x00007f0052365000)
x@blackstar:~/$ ldd /usr/bin/nano | awk '{print $3}'
/lib/x86_64-linux-gnu/libtinfo.so.6/lib/x86_64-linux-gnu/libncursesw.so.6

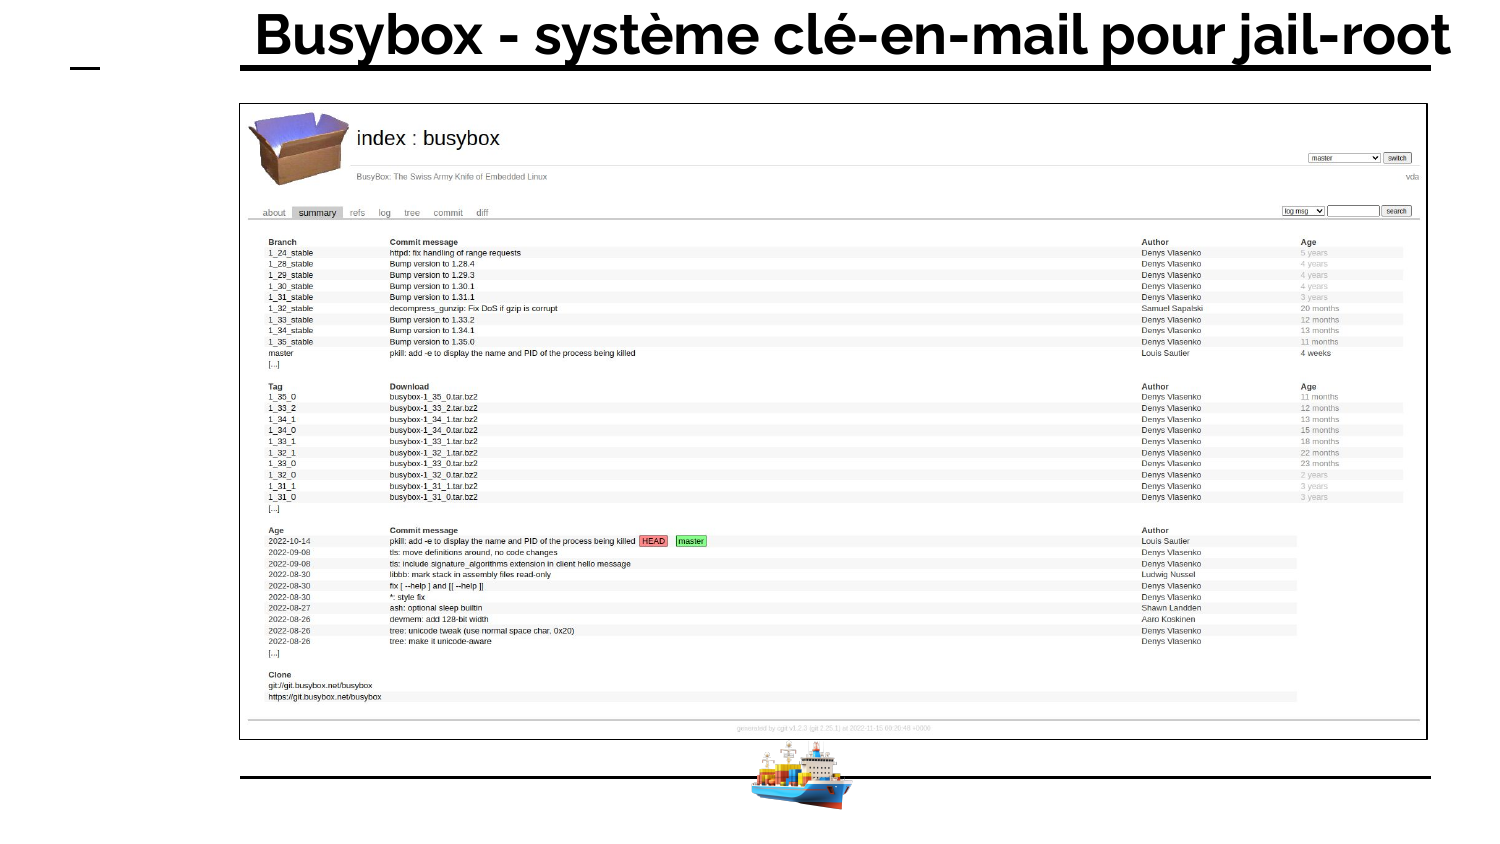
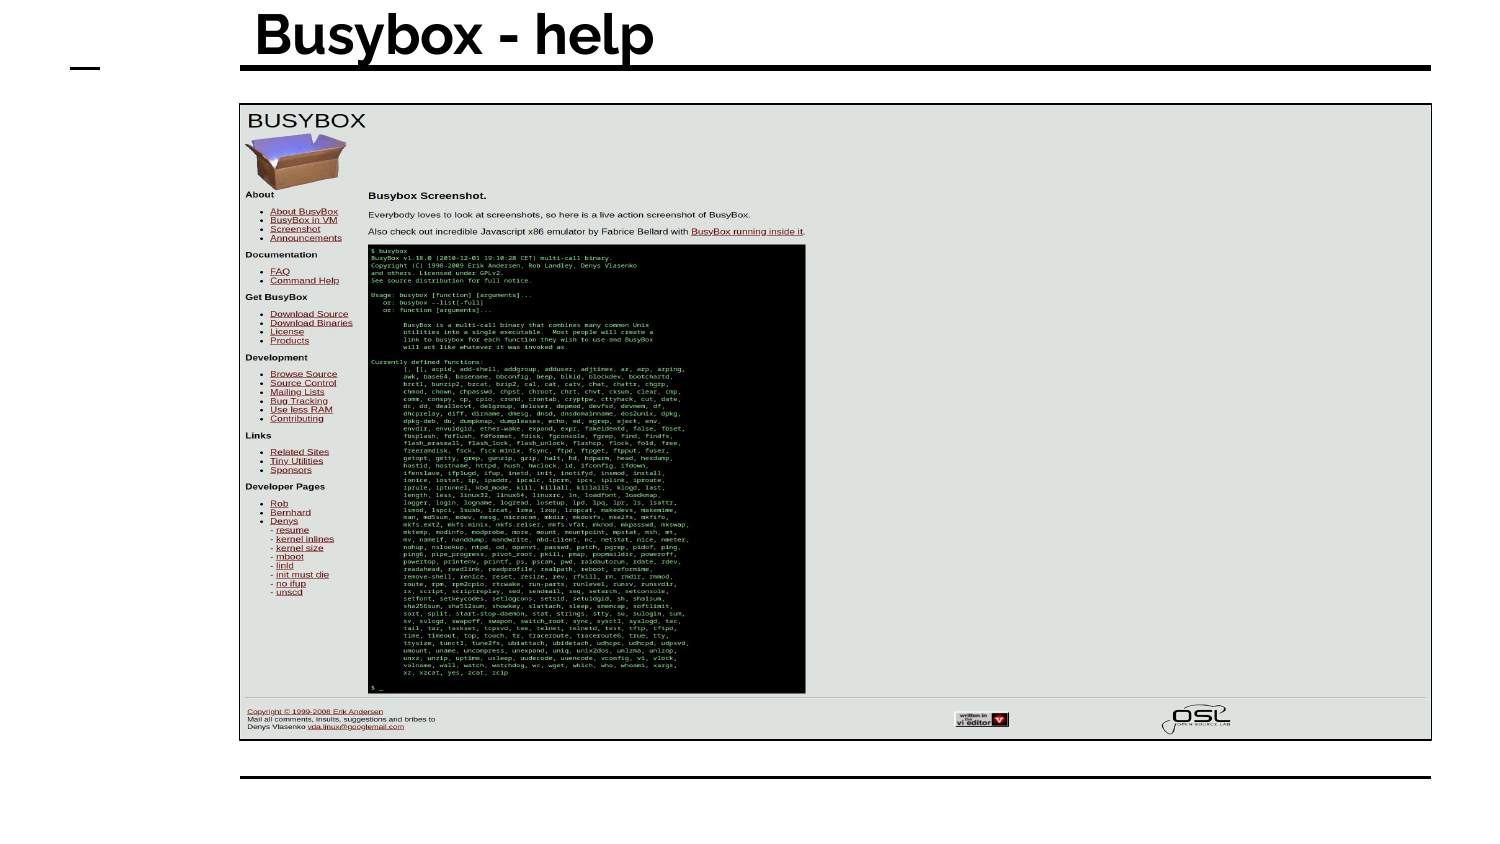
Busybox références
Essayez les commandes …
# telecharger de https://busybox.net/
cd
wget https://busybox.net/downloads/busybox-1.36.1.tar.bz2
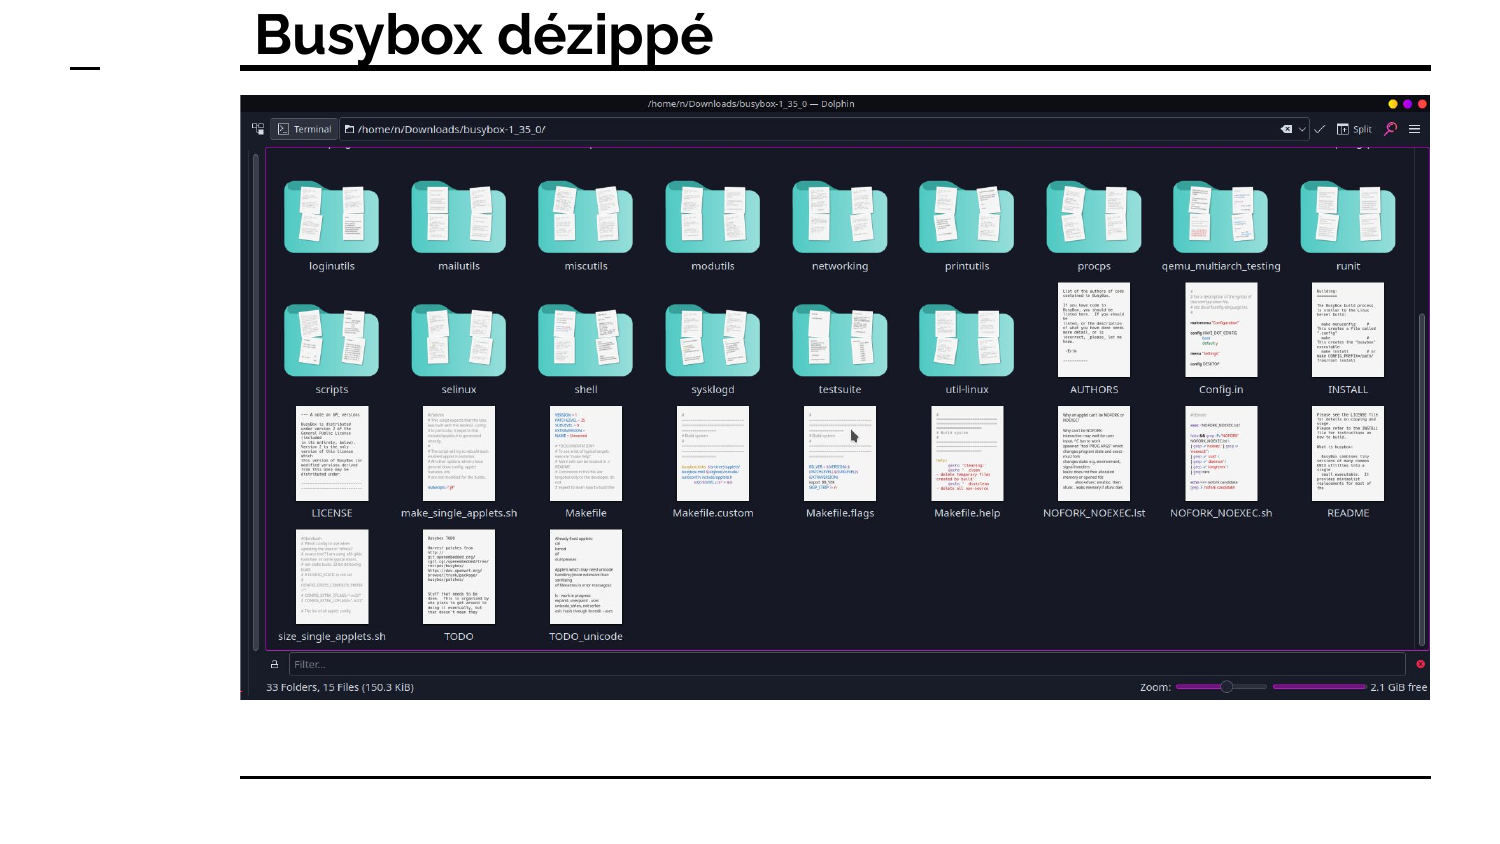
tar xvf busybox-1.36.1.tar.bz2mv busybox-1.36.1 busyboxcd busyboxmake defconfigmake cleanmake LDFLAGS=-static
sudo cp busybox ~/$MOUNTPOINT/usr/bincd ~/$MOUNTPOINT
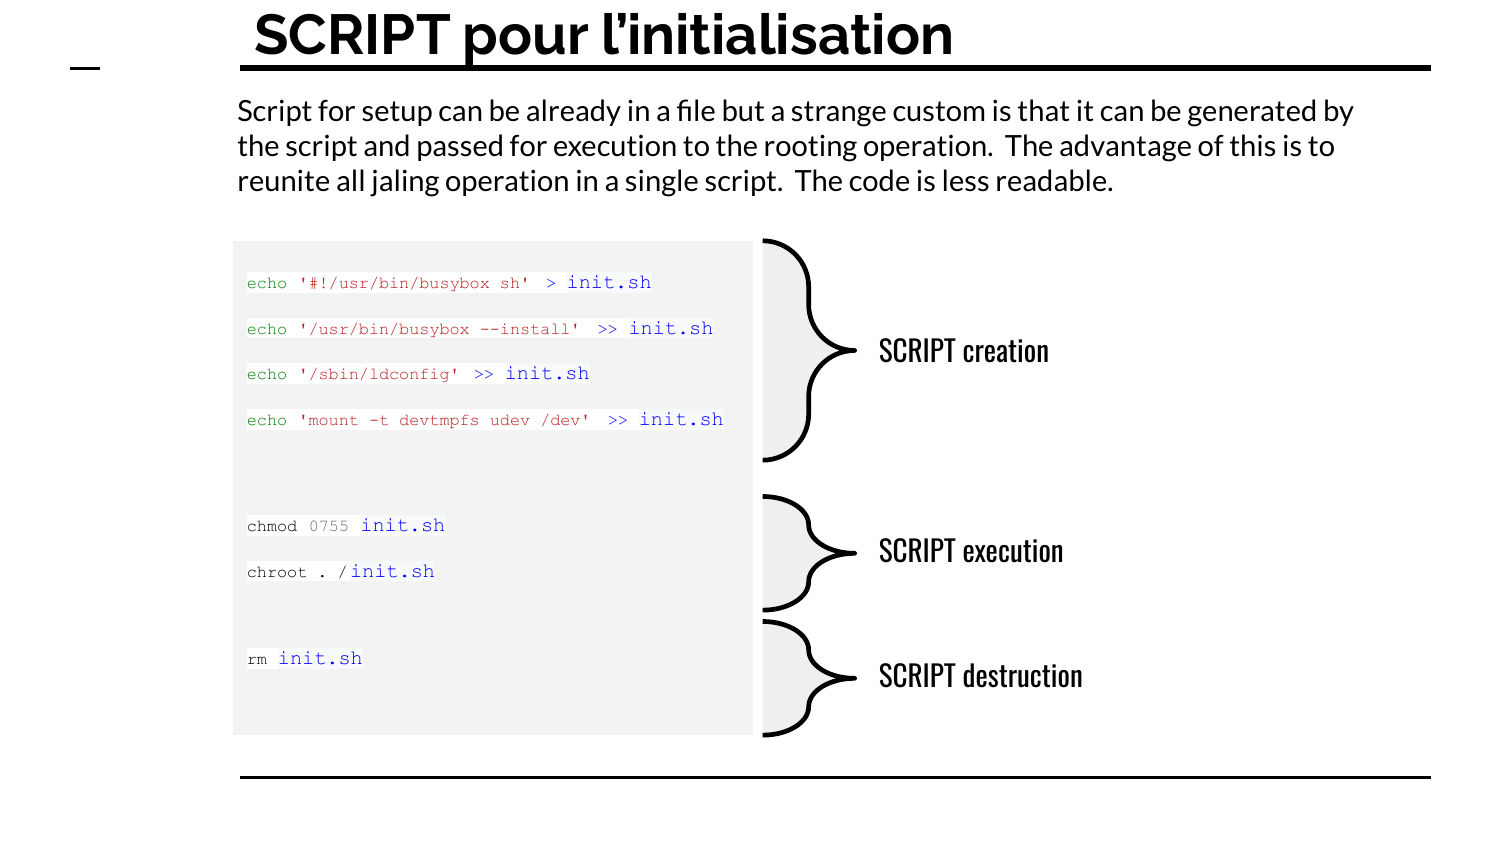
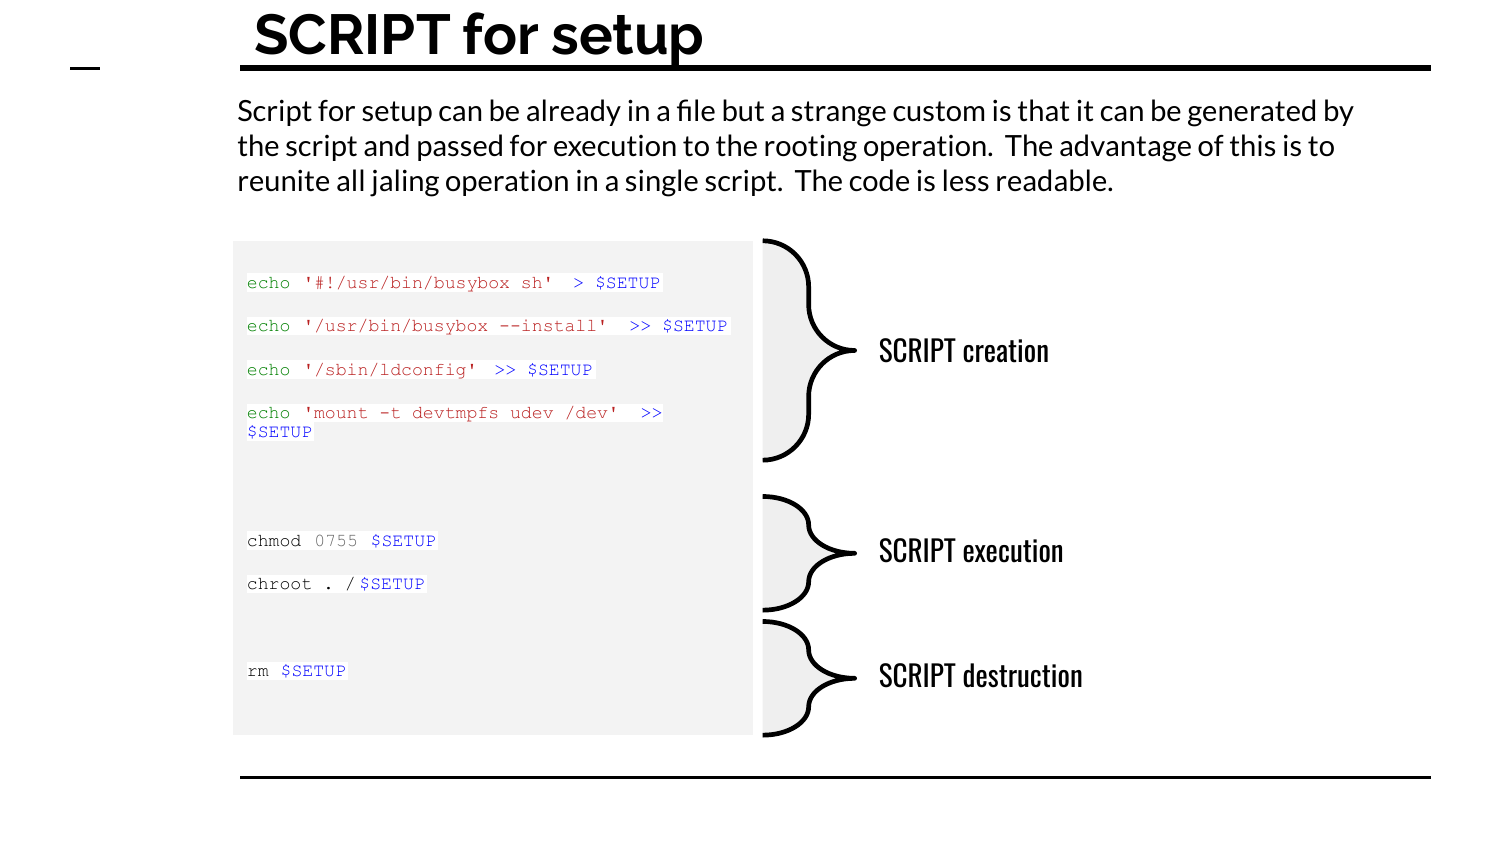
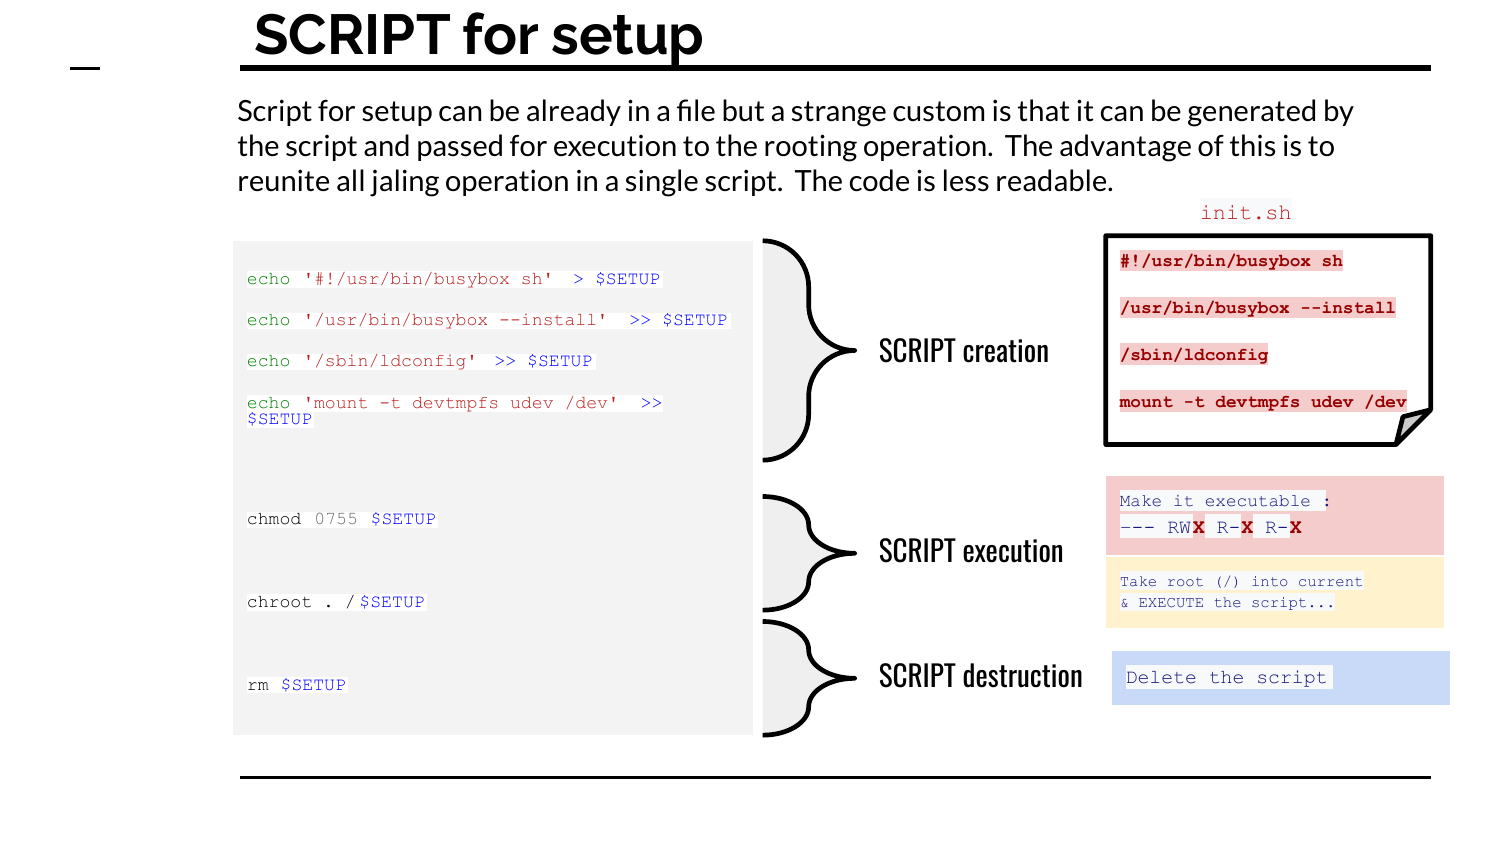
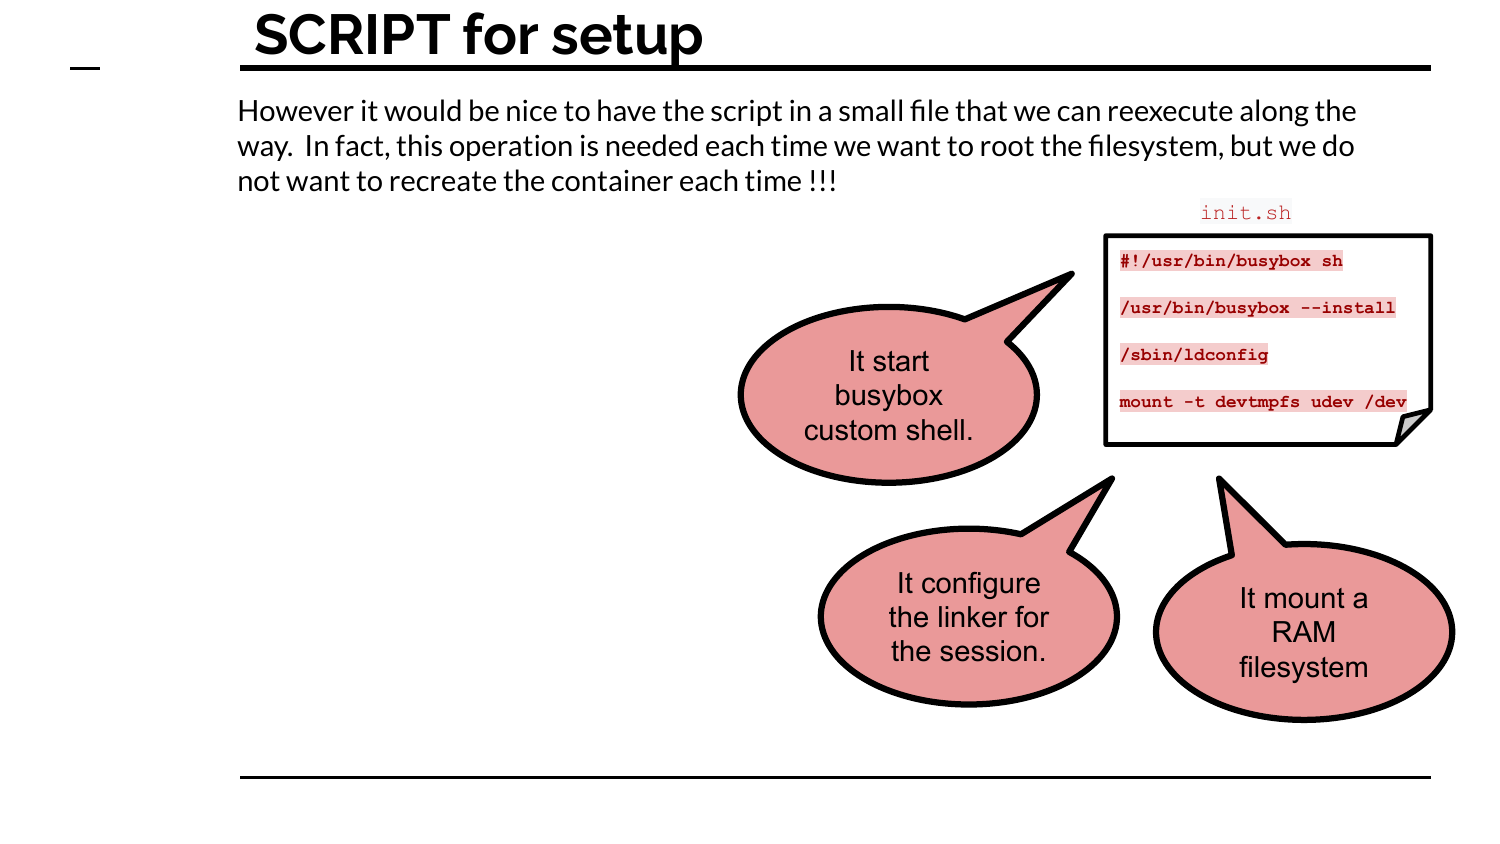
Essayez les commandes …
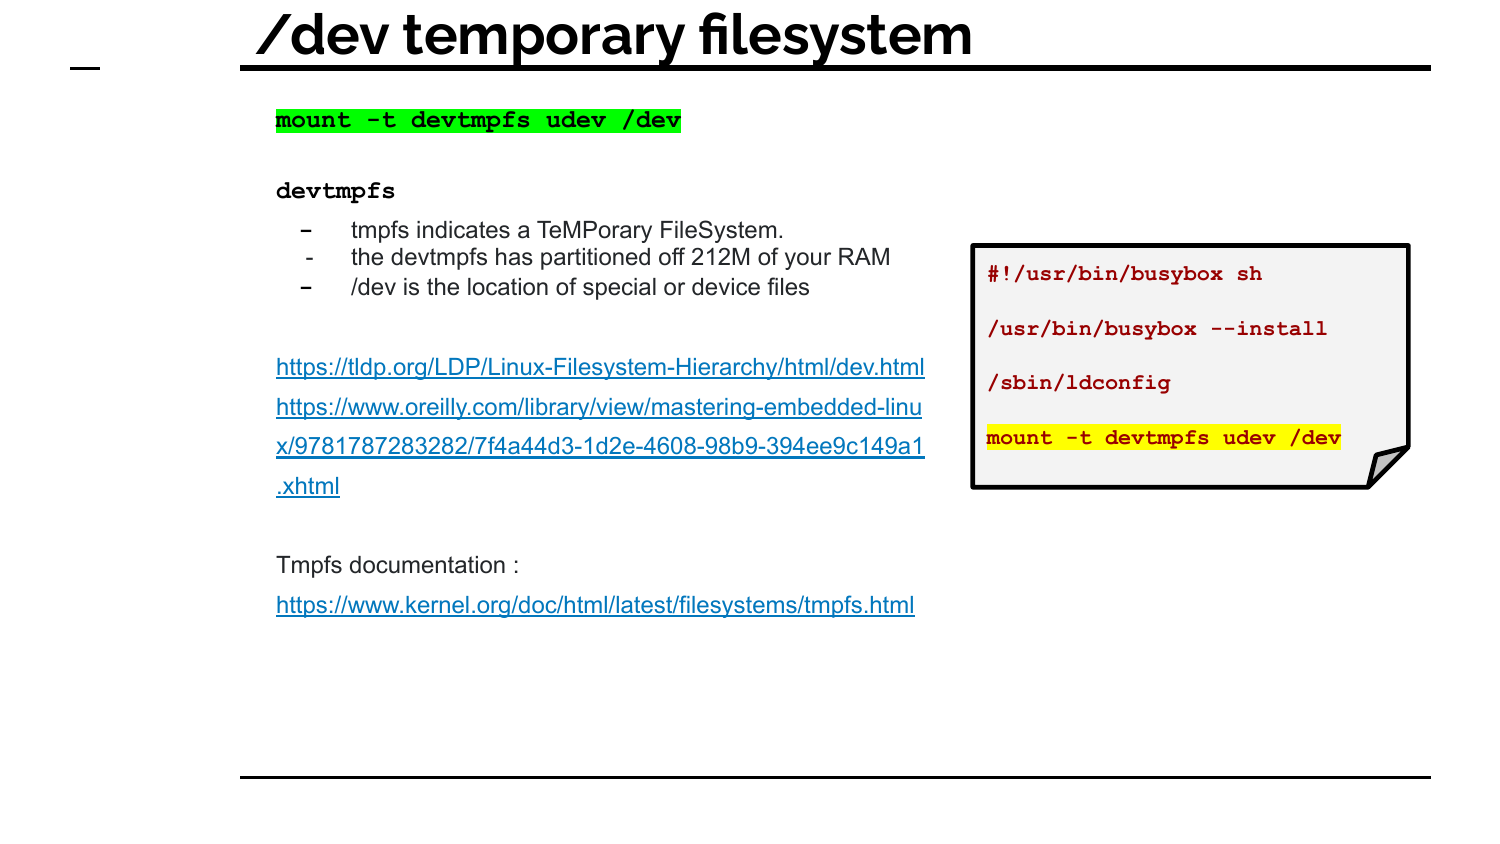
SETUP='init.sh'
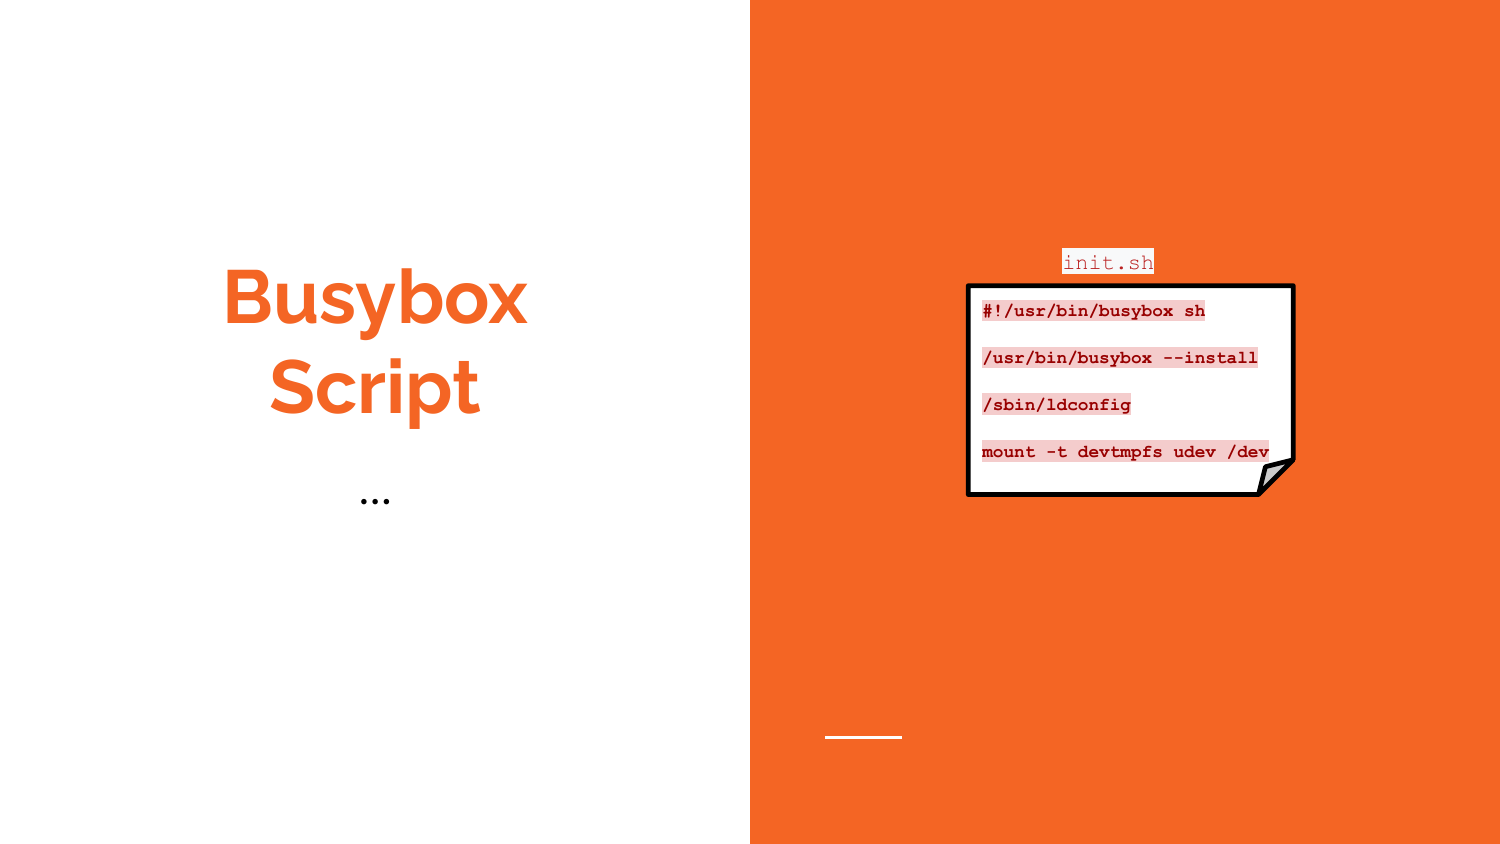
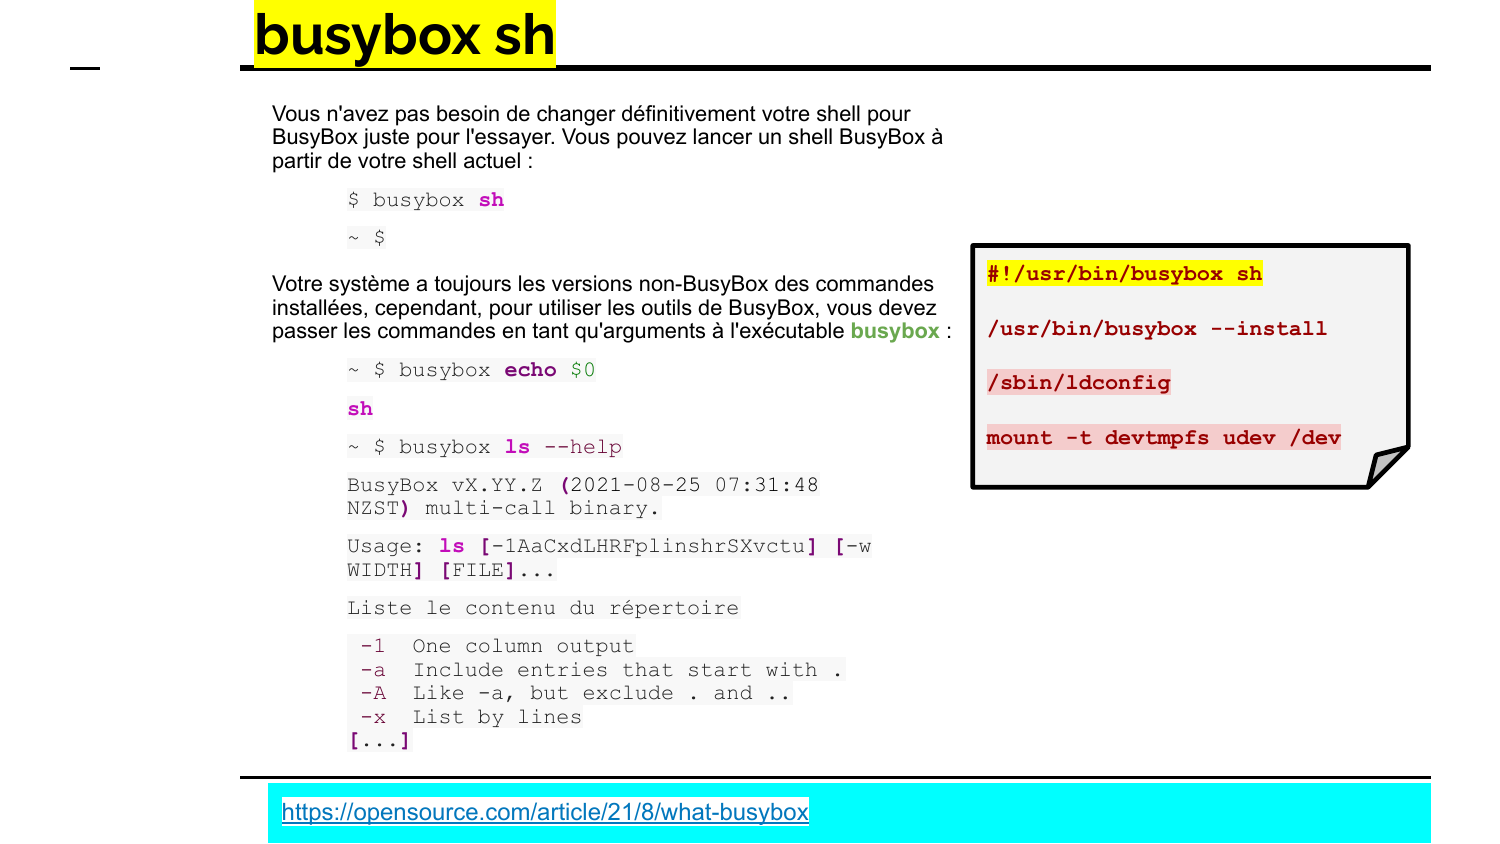
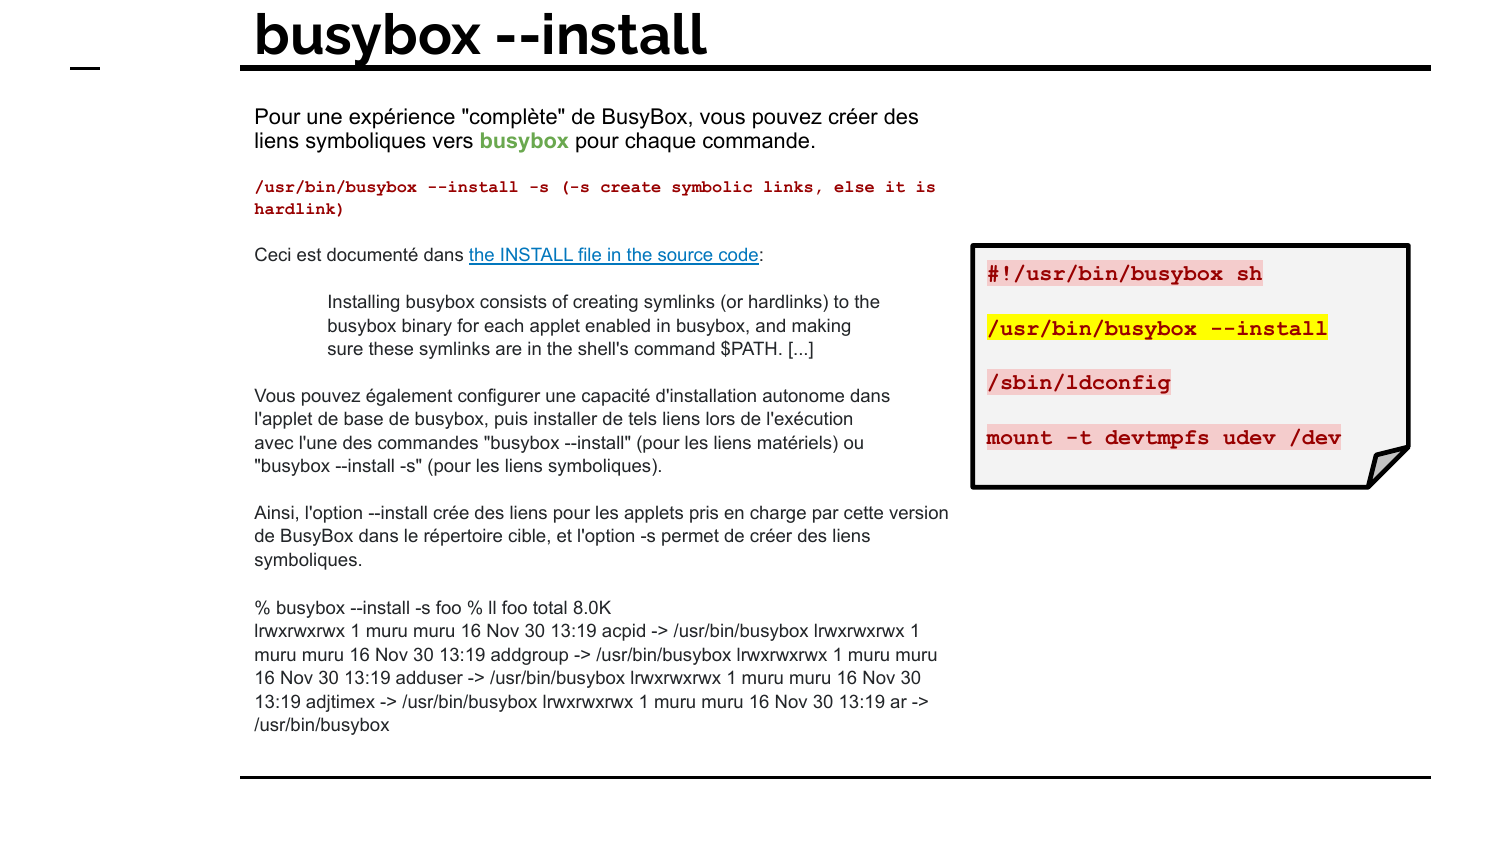
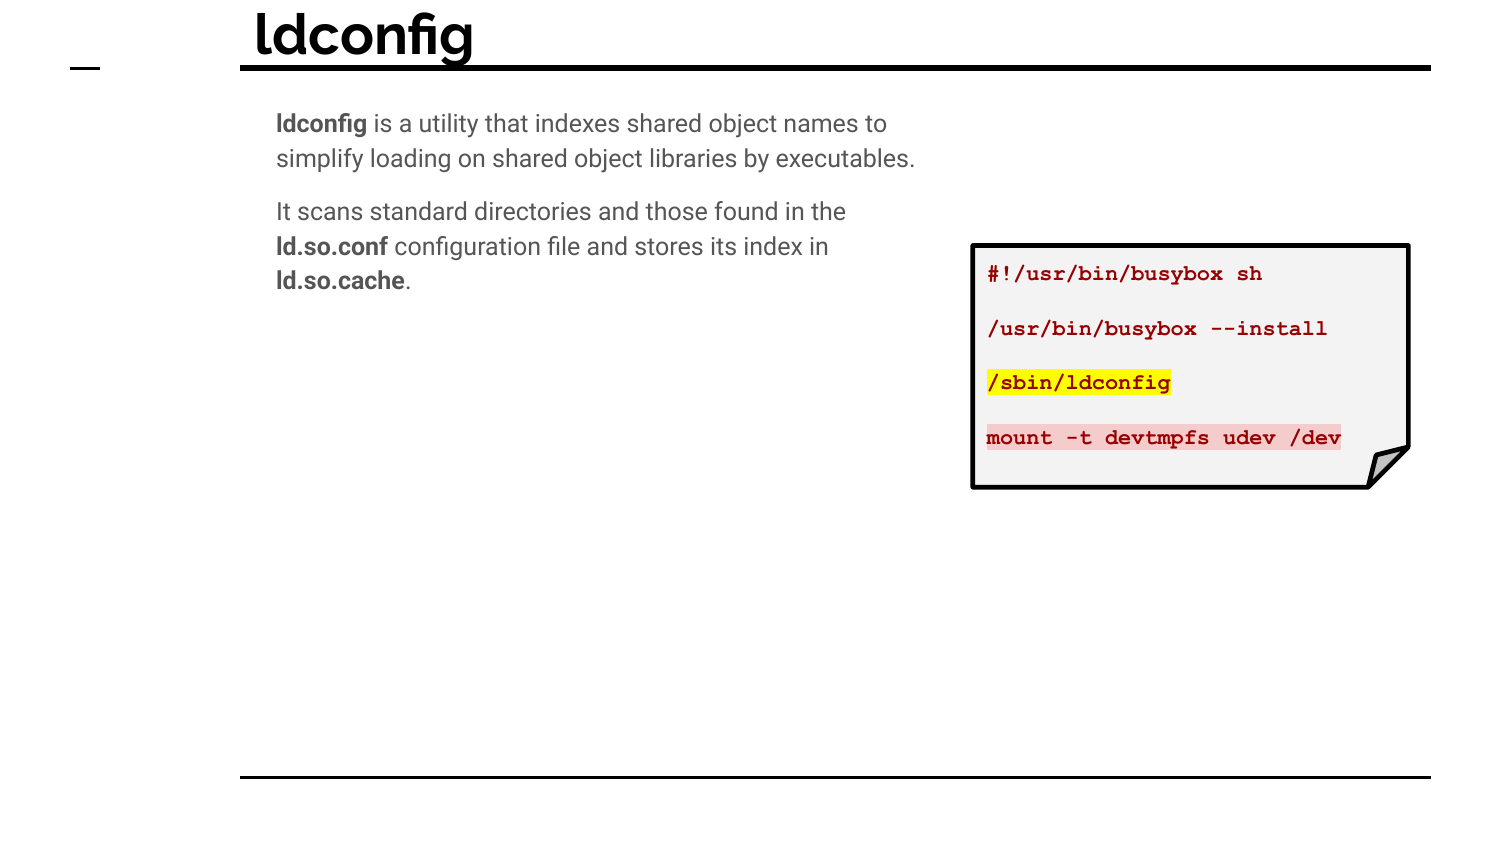
sudo touch $SETUPsudo chmod 0777 $SETUPsudo echo '#!/usr/bin/busybox sh' > $SETUPsudo echo '/usr/bin/busybox --install' >> $SETUPsudo echo '/sbin/ldconfig' >> $SETUPsudo echo 'mount -t devtmpfs udev /dev' >> $SETUP
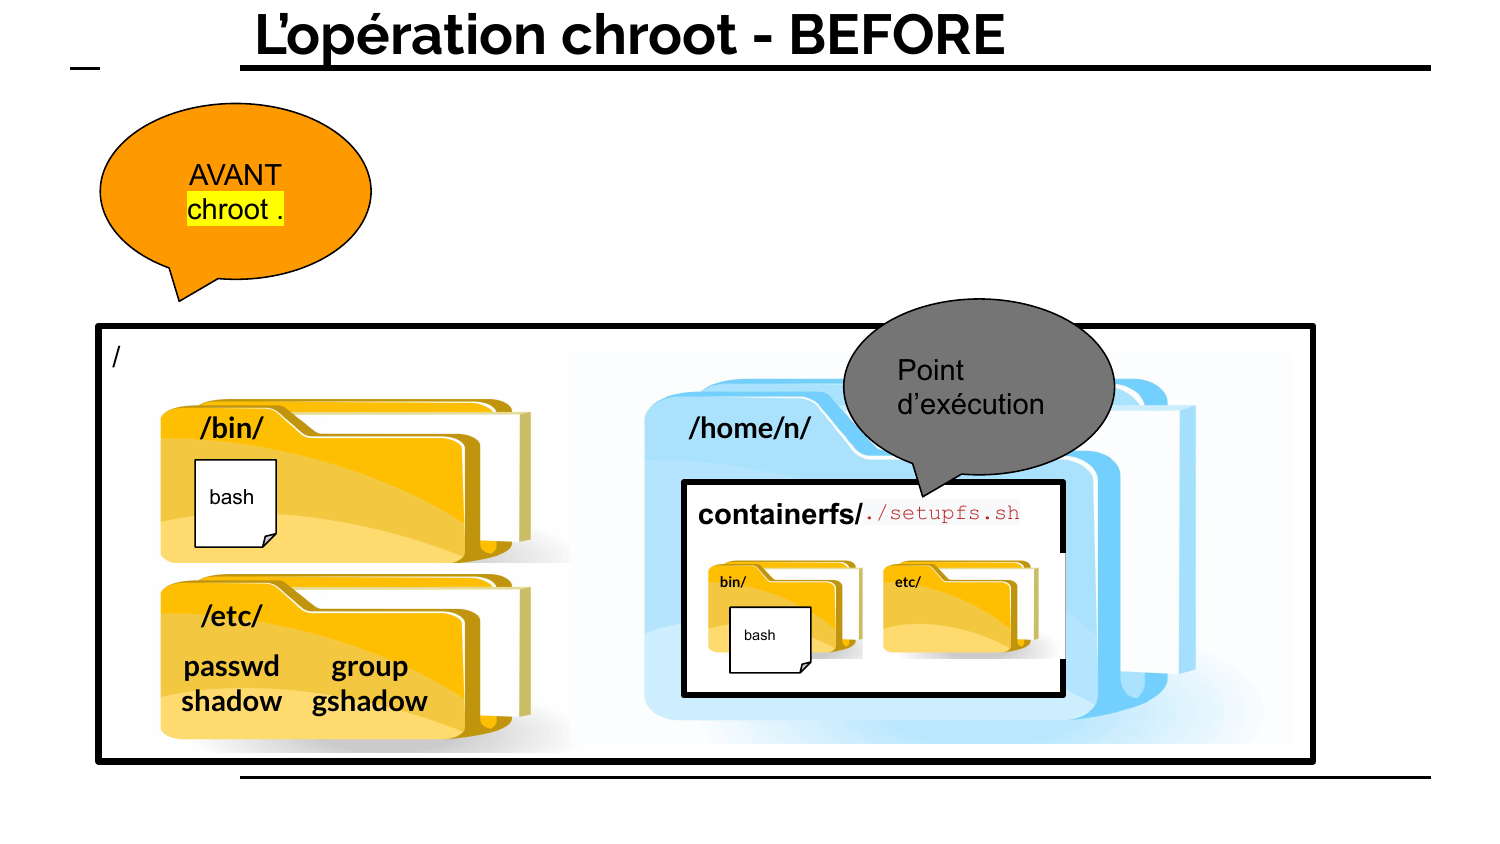
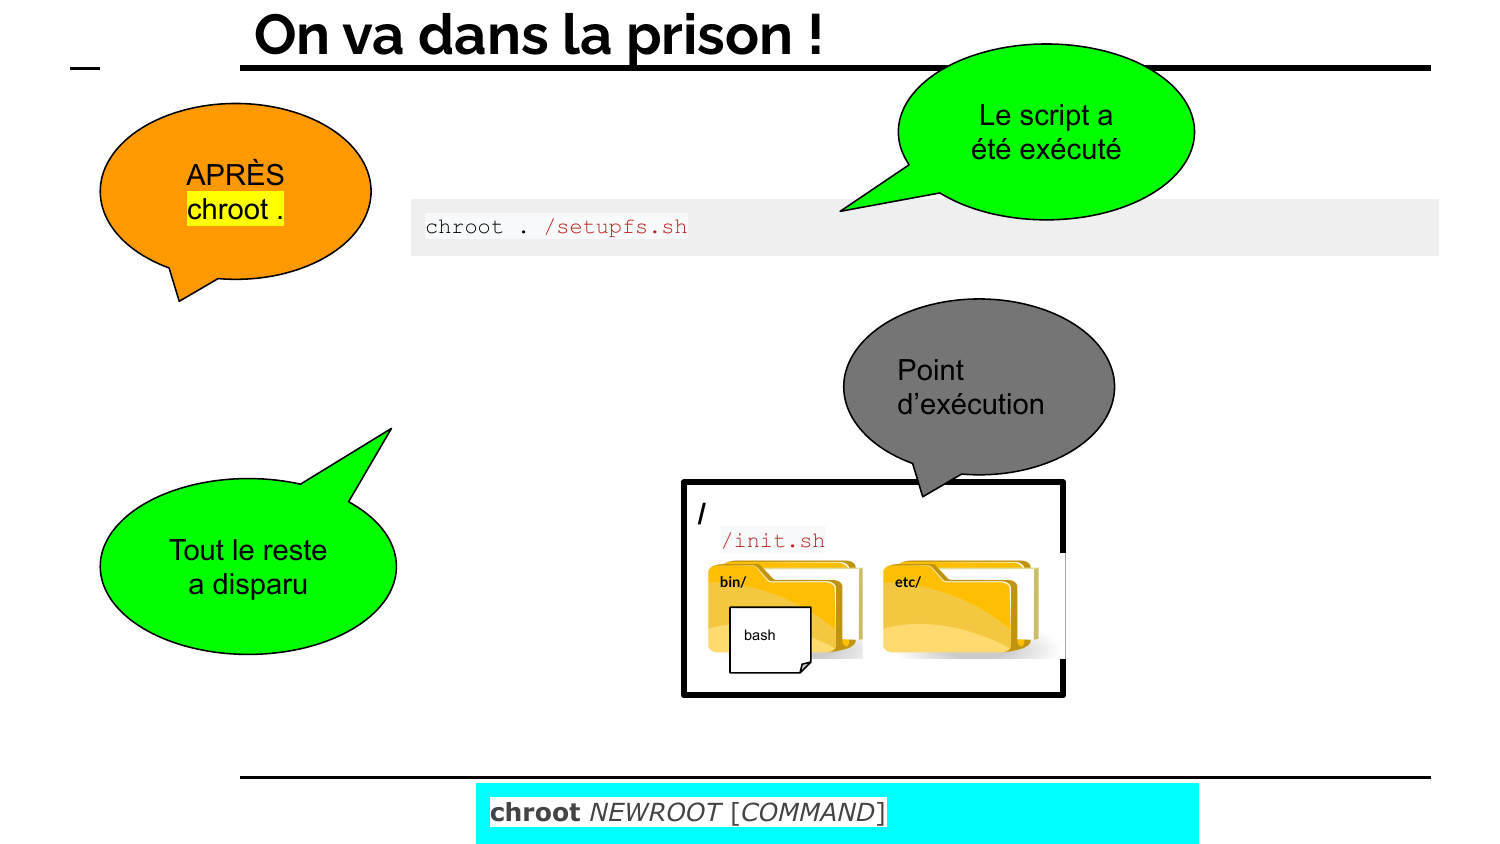
sudo chroot . /$SETUPsudo rm $SETUP

Essayez de changer le nom d'hôte
à l'intérieur du conteneur.
Soit le faire manuellement :
- Editer /etc/hostname avec nano
Ou le faire avec une commande
- Importer la commande hostnamectl (en utilisant la procédure)
- Chroot vous-même dans le conteneur
- L’utiliser pour faire un set du hostname
Vérifier le hostname avec une commande
- Importer la commande hostname (avec la procédure) (ou busybox)
- Chroot vous-même dans le conteneur
- Utiliser la commande hostname
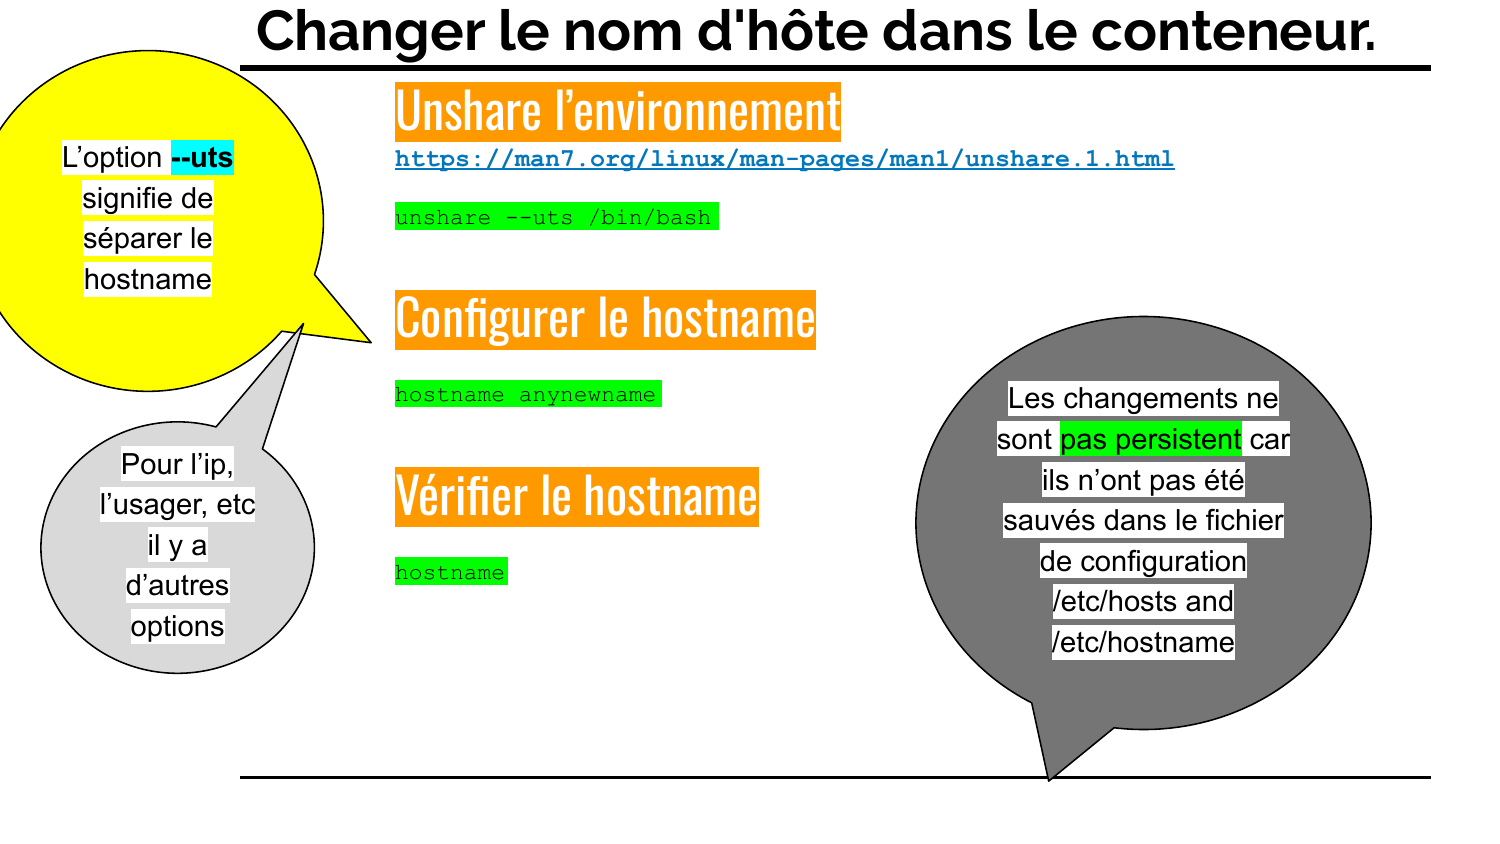
Cela ne fonctionne pas car il n'a pas sa propre espace de nom !
Options unshare
-i, --ipc[=file]
Unshare the IPC namespace. If file is specified, then a persistent namespace is created by a bind mount.
-m, --mount[=file]
Unshare the mount namespace. If file is specified, then a persistent namespace is created by a bind mount. Note that file must be located on a mount whose propagation type is not shared (or an error results).
-n, --net[=file]
Unshare the network namespace. If file is specified, then a persistent namespace is created by a bind mount.
-p, --pid[=file]
Unshare the PID namespace. If file is specified, then a persistent namespace is created by a bind mount.
-u, --uts[=file]
Unshare the UTS namespace. If file is specified, then a persistent namespace is created by a bind mount.
-U, --user[=file]
Unshare the user namespace. If file is specified, then a persistent namespace is created by a bind mount.
-C, --cgroup[=file]
Unshare the cgroup namespace. If file is specified, then persistent namespace is created by bind mount.
-T, --time[=file]
Unshare the time namespace. If file is specified, then a persistent namespace is created by a bind mount.
unshare --root=. -f -p --mount-proc
--mount-proc[=mountpoint]
Just before running the program, mount the proc filesystem at mountpoint (default is /proc). This is useful when creating a new PID namespace. It also implies creating a new mount namespace since the /proc mount would otherwise mess up existing programs on the system. The new proc filesystem is explicitly mounted as private (with MS_PRIVATE|MS_REC).
-f, --fork
Fork the specified program as a child process of unshare ather than running it directly. This is useful when creating a new PID namespace. Note that when unshare is waiting for the child process, then it ignores SIGINT and SIGTERM and does not forward any signals to the child. It is necessary to send signals to the child process.
-p, --pid[=file]
Unshare the PID namespace. If file is specified, then a persistent namespace is created by a bind mount. (Creation of a persistent PID namespace will fail if the --fork option is not also specified.)
-R, --root=dir
run the command with root directory set to dir.
Essayez les commandes …
sudo unshare --root=. -f -p --mount-proc
TERM="xterm"
Namespace références


Installer une application dedans
C
Install an application inside
A
Créer des utilisateurs
U
dans le conteneur…
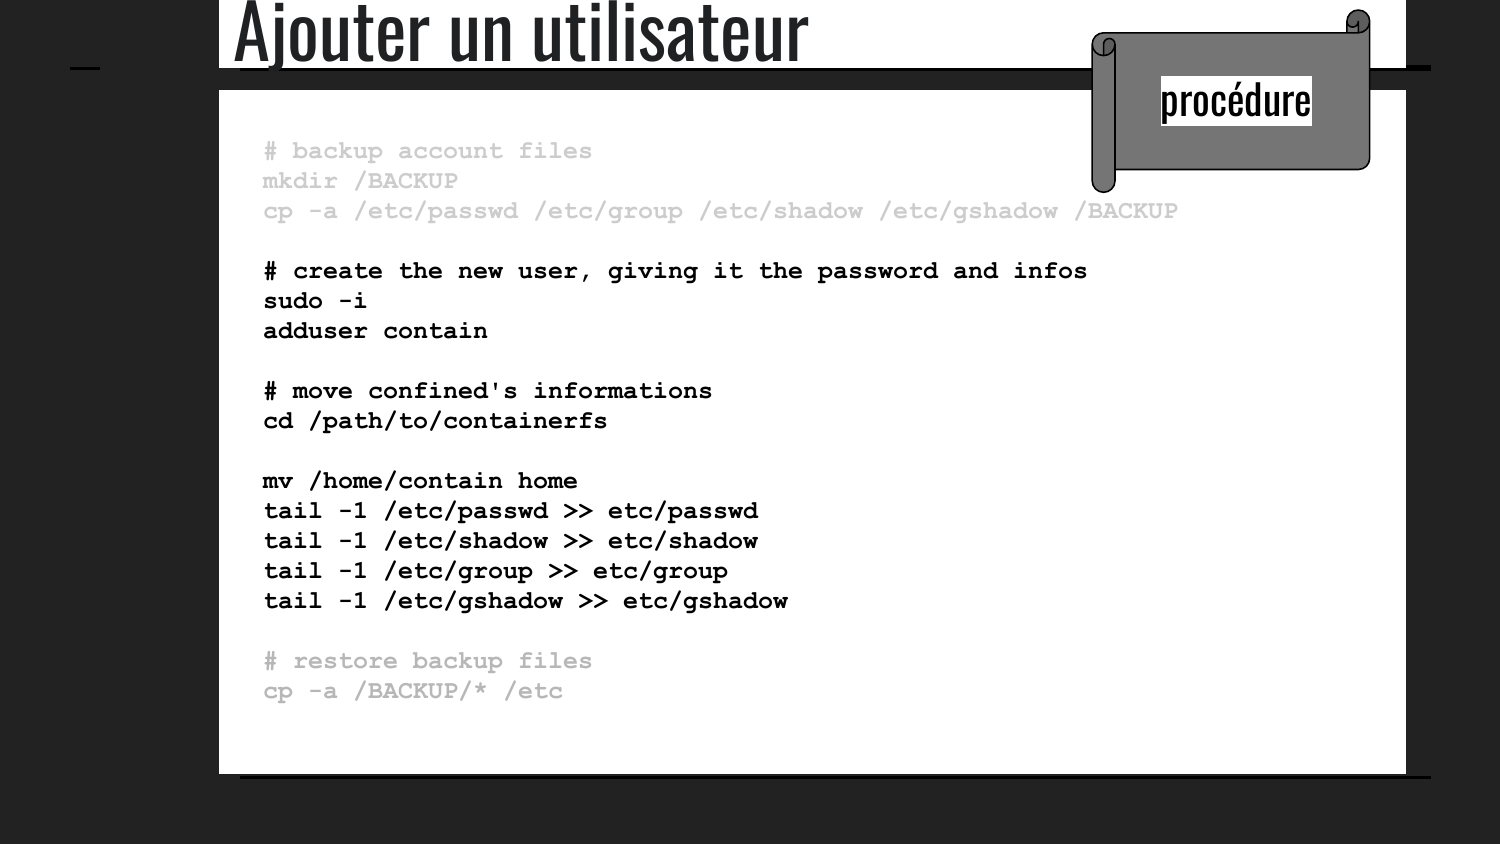
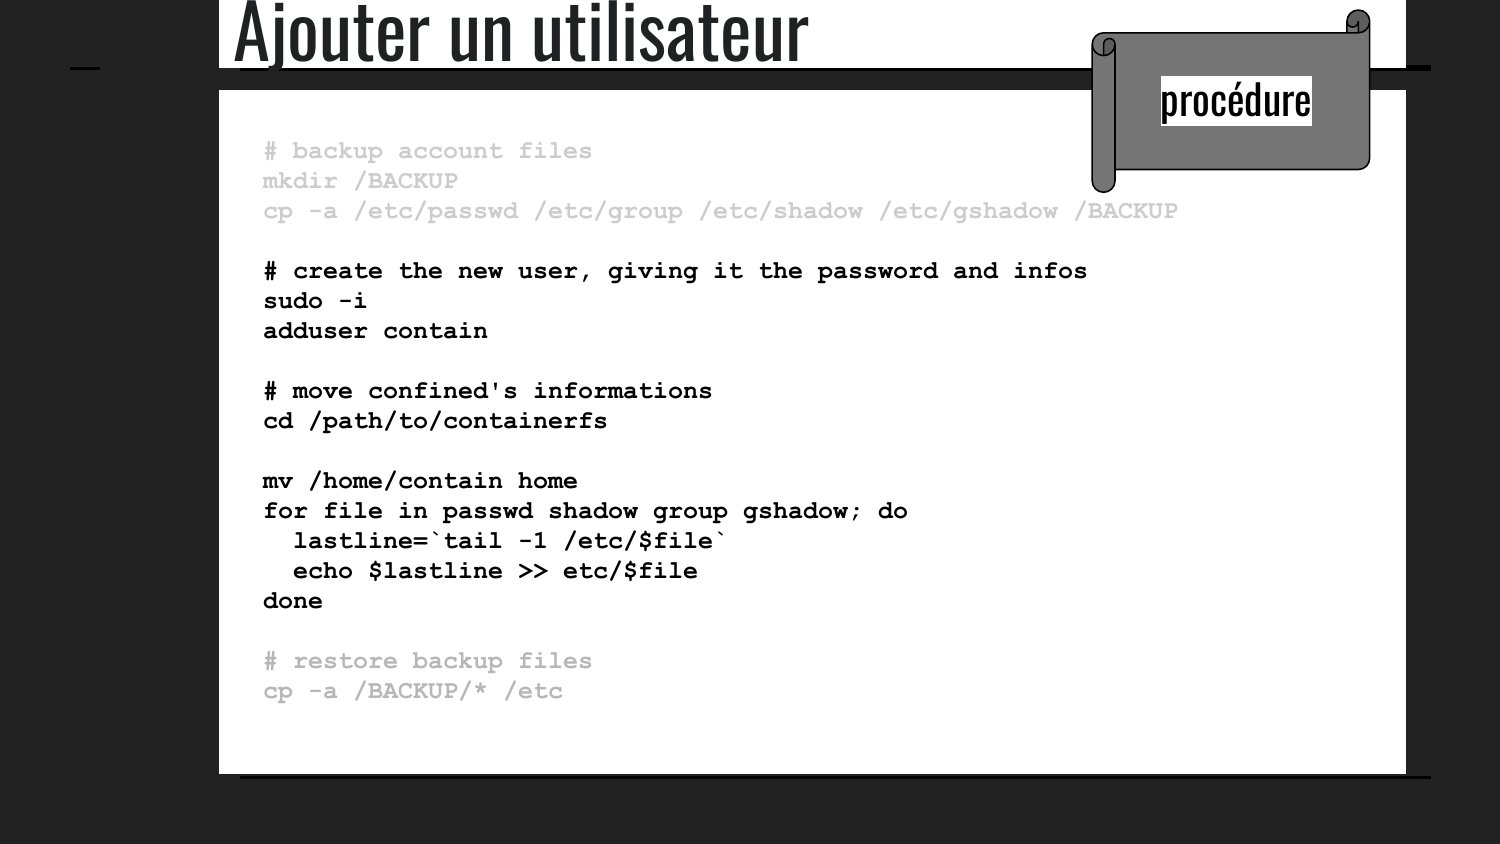
Ajouter un utilisateur dans le conteneur
What is added inside each file :
-----------
Adding the following to passwd:
confined:x:1002:1002:Confined User,,,:/home/confined:/bin/bash
Adding the following to shadow:
confined:$6$IWggtEOxCbsGuThn$cVQVRNWEG4LDydaHZ5c01.rBb0/tsPSEo2dmCoxjkIsnc5/m9wK5rOHYGwrD96fRZoJK2doPllV3EEVYuvZRb.:18951:0:99999:7:::
Adding the following to group:
confined:x:1002:
Adding the following to gshadow:
confined:!::
-----------
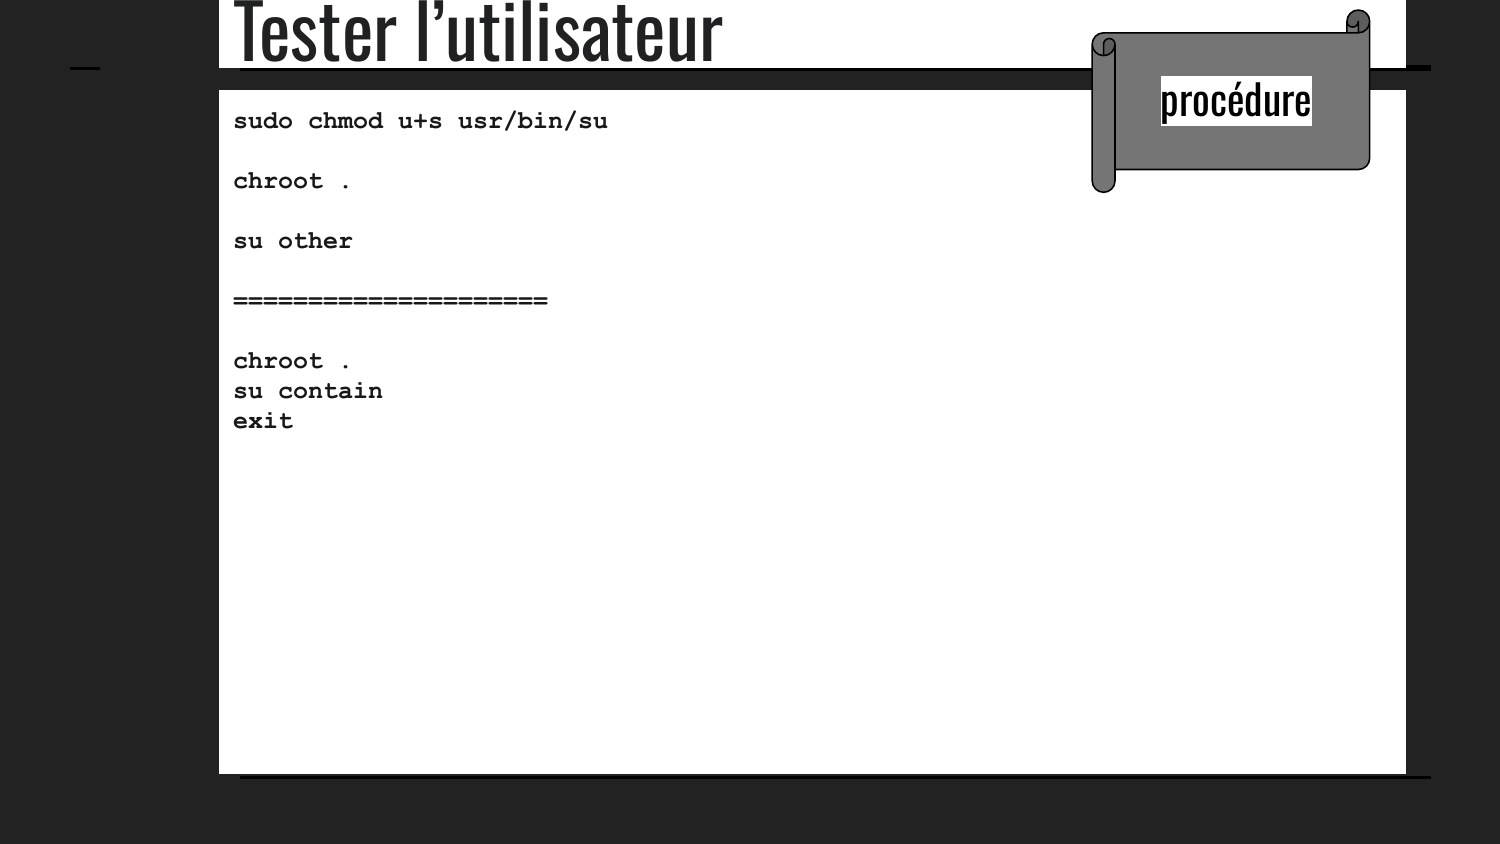
Procédurescomplètes
P
Conteneur personnalisé
Mount outside
O
From the inside
Mount outside from inside
Bind-mount répertoire dans chroot (read-write)
Vous pouvez faire un bind-mount répertoire dans votre racine chroot avec:
mount /out/side /chroot/point_to_outside -o bind
(see man mount, section "The bind mounts").
Désormais, tout accès à /chroot/x/y se comporte exactement comme un accès à /x/y : mêmes listes de fichiers, mêmes contenus, mêmes inodes.
Bind-mount répertoire dans chroot (read-only)
Notez cependant que cela inclut l'ensemble du répertoire tel quel : un processus à l'intérieur du chroot qui peut écrire dans le répertoire pourra également écrire dans le répertoire "réel" à l'extérieur. Si vous souhaitez rendre le montage à l'intérieur du chroot en lecture seule, vous devez le remonter explicitement en lecture seule après la liaison
mount -o remount,ro /chroot/x/y
Le répertoire d'origine /x/y restera en lecture-écriture, mais la copie sera désormais en lecture seule.
Mount le host complet du conteneur !
Dans l’host - trouver le nom du device
x@computer:~$ df .
Filesystem 1K-blocks Used Available Use% Mounted on
/dev/mapper/vg0-lv--0 8187320 4471888 3279824 58% /
GO dans le chroot
mount fsimage containerfschroot containerfs
De dans le chroot - mount le device
bash-5.1# mkdir /mainfs
bash-5.1# mount /dev/mapper/vg0-lv--0 /mainfs
Qu’est-ce qui rend cela possible en-dedans ?
Avoir la commande mount
Line 40 :
cp /usr/bin/busybox usr/bin
Line 58 : (executed at 63) prepare the hardlink from mount to busybox
echo '/usr/bin/busybox --install' >> $SETUP
Avoir la device physique configurée
La ligne ‘mount -t devtmpfs udev /dev’
Incluse dans le script à la ligne 60 et exécutée à la ligne 63.
Line 50 :
echo 'mount -t devtmpfs udev /dev' >> $SETUP
Line 63 :
chroot . /$SETUP
Mount obligatoire - 2 mount impliqués
1st mount
Line 50 :
bash# mount -t devtmpfs udev /dev
Prenez la liste virtuelle (imaginaire) de tous les périphériques, gérée par le noyau, et montez-la dans un répertoire accessible en lecture.
ls /dev et le host drive device dedans( /dev/mapper/vg0-lv--0 or /dev/sda2 or ...)
2nd mount
bash# mount /dev/mapper/vg0-lv--0 /mainfs
Lorsque vous prenez le nom du périphérique rendu accessible sur /dev par le premier montage,
et que vous le montez dans un nouveau répertoire.
Mount from the inside - Bugs track
Mount from the inside - Research
You need to use "bind mount" if you want to create a link from inside the chroot to outside. And you need to run the mount command out of chroot..mount /out/side /chroot/point_to_outside -o bind
https://unix.stackexchange.com/questions/140599/chroot-jail-that-can-access-the-filesystem
You can bind-mount directories into your chroot root with:
mount -o bind /x/y /chroot/x/y
(see man mount, section "The bind mounts"). Any access to /chroot/x/y from now on acts exactly like an access to /x/y: same file listings, same contents, same inodes.
Note, however, that this puts the entire directory in as-is: a process inside the chroot that can write to the directory will be able to write to the "real" directory outside. If you want to make the mount inside the chroot read-only you need to remount explicitly read-only after the bind:
mount -o remount,ro /chroot/x/y
The original /x/y will remain read-write, but the copy will now be read-only.

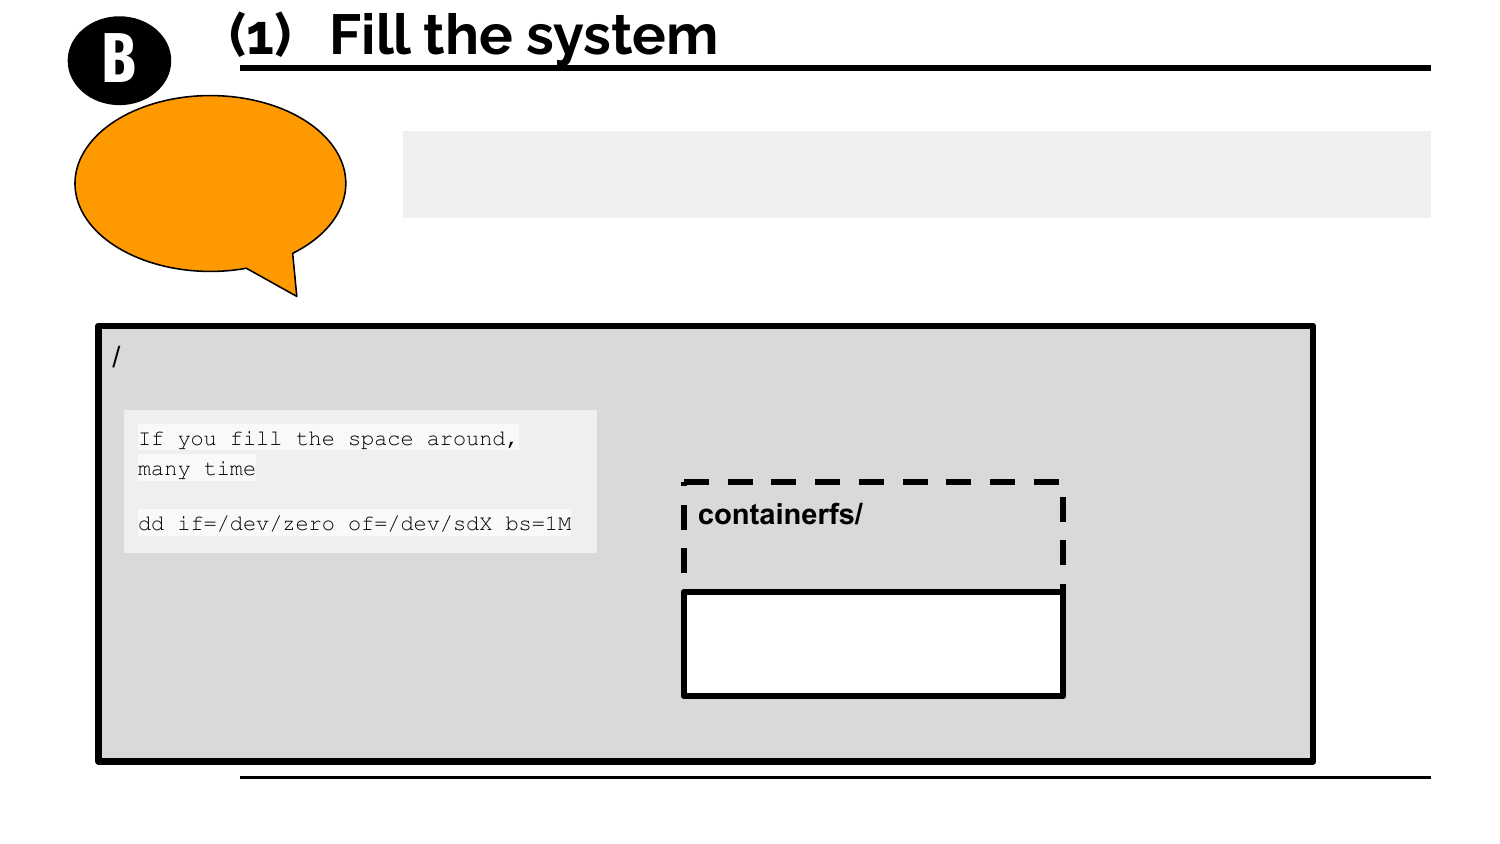
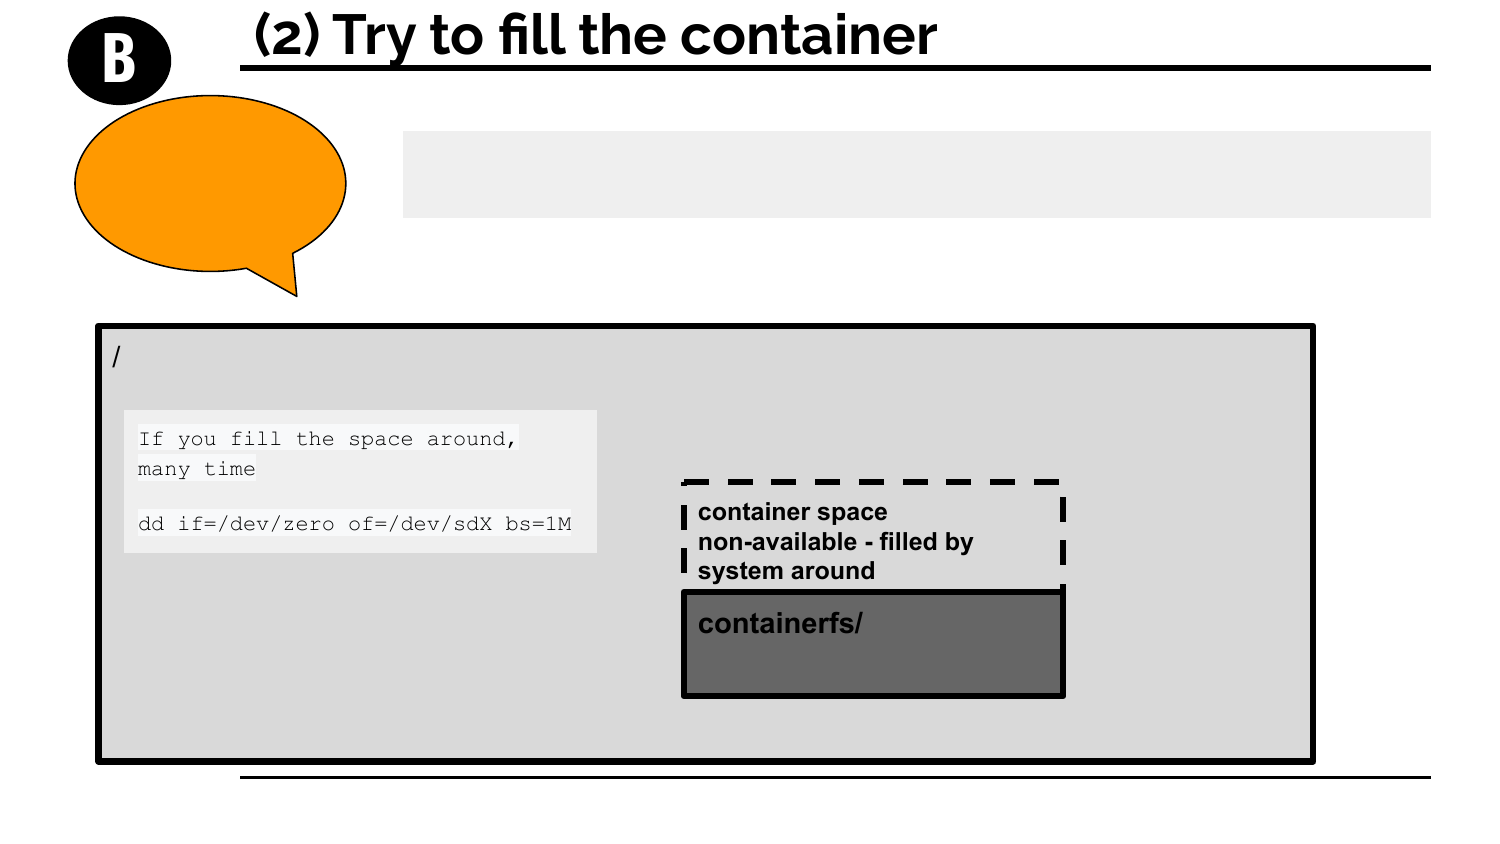
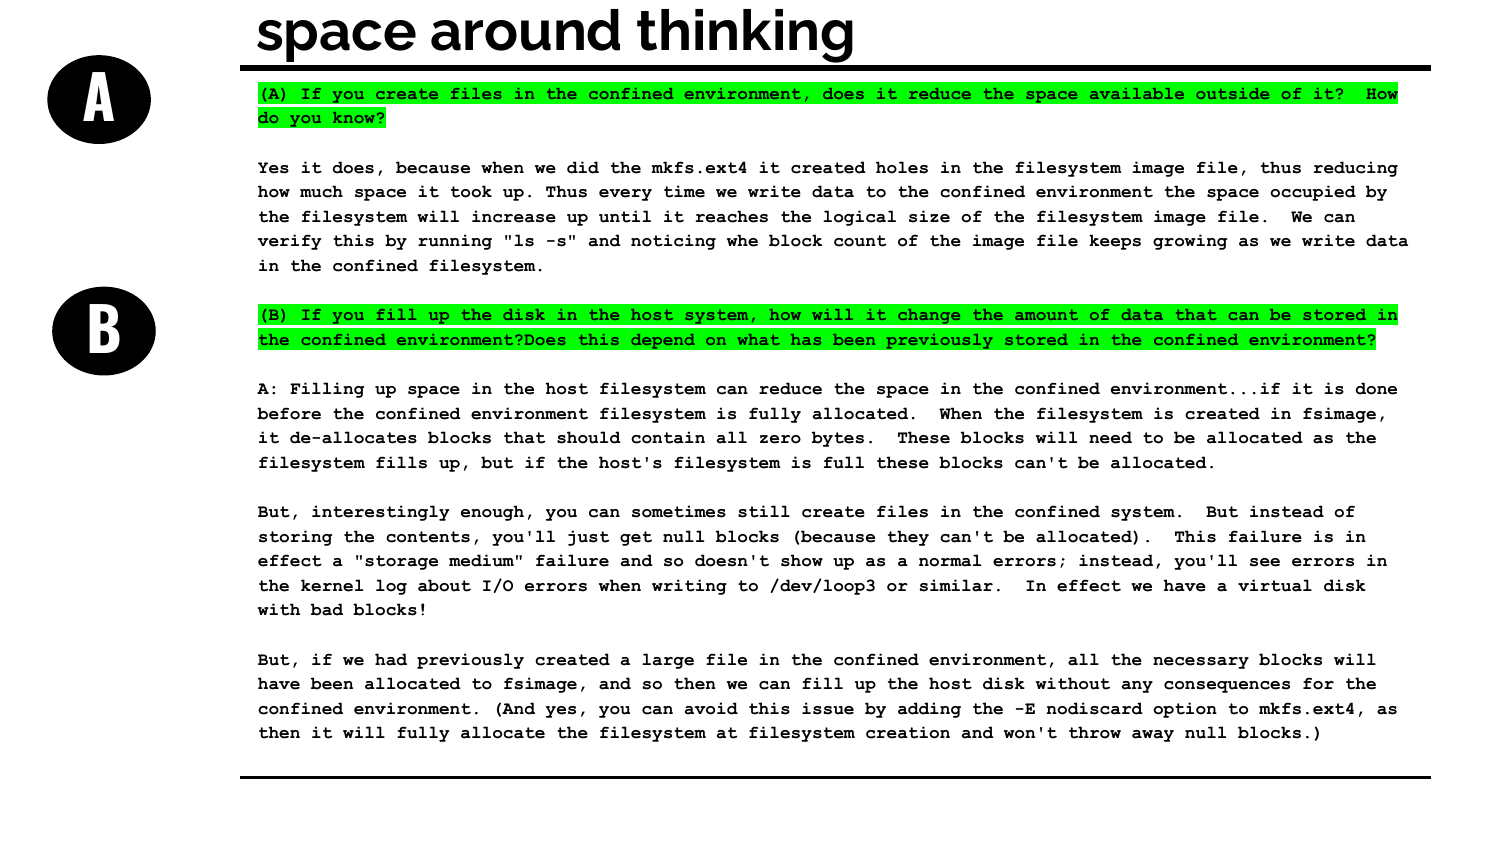
Is the container waterproof ?
S
Or what are SPARSE files and why do we need to know.
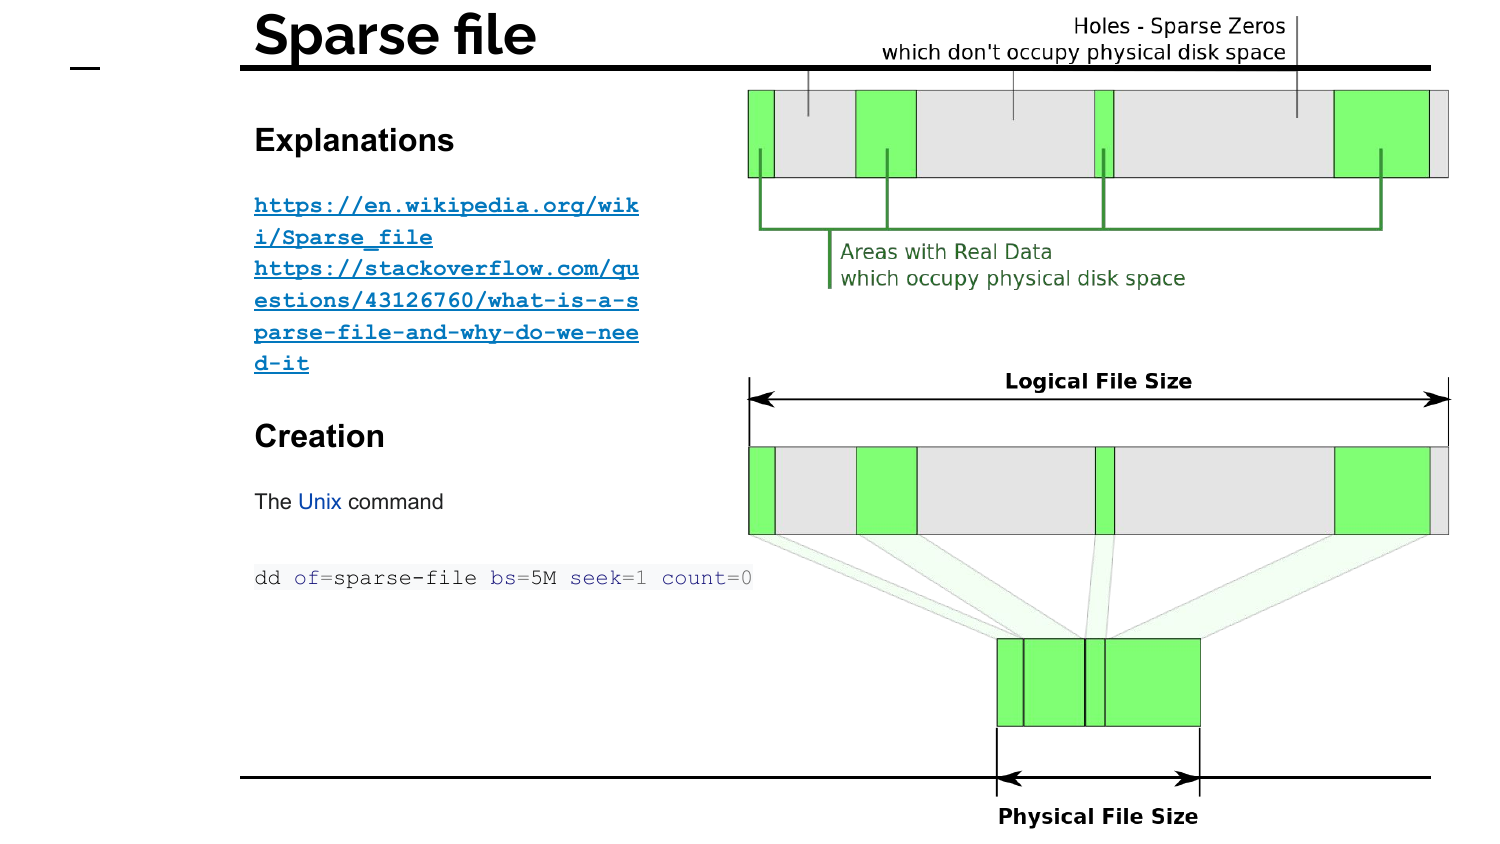
What are inodes
S
…
Find where same inode point
(1) By doing ls -li /usr/bin we see that all files have inode 19, then they are all hardlink to the same file. We cannot find which one because all hardlink are equal to the original.
But by changing /usr/bin/busybox --installto /usr/bin/busybox --install -s
We observe now that all files in /usr/bin are symlinks to /usr/bin/busybox, therefore it is the original.
cd /usr/binls -aistat arfind . -inum NUM
Other types of JAIL ROOTS
J
…
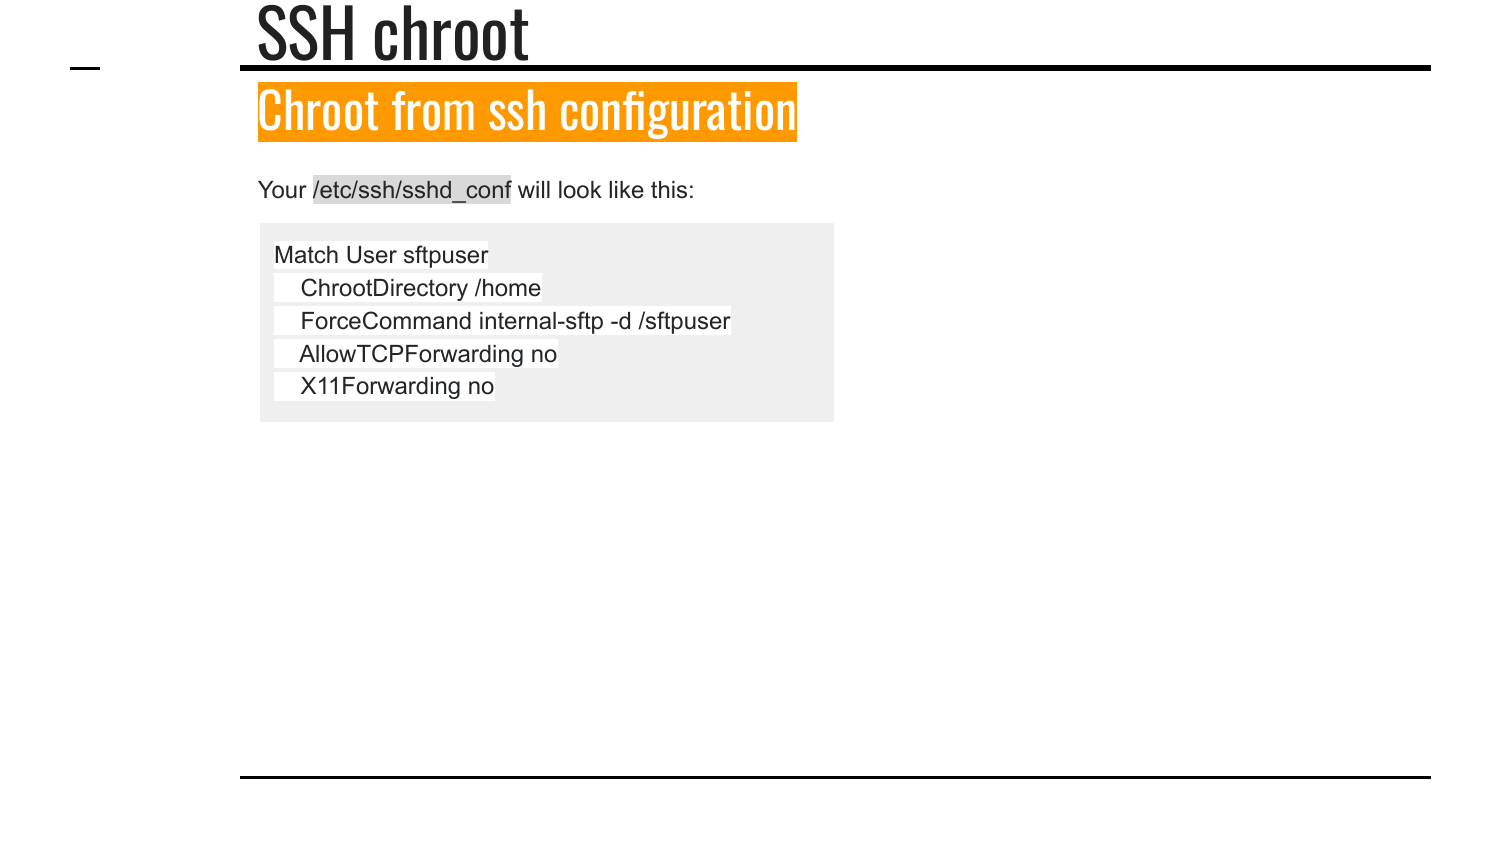
SSH chroot
Exemples
sudo chown -R root:sftpusers /home
sudo chown -R sftpuser:sftpusers /home/sftpuser
(incomplete)
Access outside directory from home
sudo chown -R root:sftpusers /home
sudo chown -R sftpuser:sftpusers /home/sftpuser
(incomplete)
Doc
Other definitions
D
…
Other jail definitions
A chroot'ed environment is often called a "chroot jail". It basically restricts the view of a set of processes so they think that the specified directory is the filesystem root.
This should not be confused with FreeBSD's jail functionality, which is a chroot on steroids (with lots of additional functionality that provides more isolation than a simple chroot would).
For the sake of clarity it's best to refer to chrooted environments as "chrooted environment" (or use the full phrase "chroot jail") to distinguish them - especially when talking about a FreeBSD system. https://serverfault.com/a/502422
Security risksin jail roots
S
…
Security risk
Security Considerations
A badly configured jail is a security risk!
If a jailed user or a jailed process can modify files in (for example) the JAIL/lib/ or JAIL/etc/ directory (i.e., those within the jail directory), the user can bypass security checks and gain root privileges.
No directory inside the jail except for the user's home directory or tmp should be writable by the user. Especially the root of the jail should not be writable by the user. Jailkit utilities can be used to perform some basic checks to verify that a jail is secure and abort if a jail is not secure. Check your logfiles if things don't work as expected.
The super user (root), or any process running with root privileges, can always break out of a jail. It is therefore important that the processes inside the jail do not have root privileges, nor have the means to receive those privileges. Avoid setuid (+s) executables inside the jail. If the jail is on a separate filesystem, the jail filesystem can mounted with the nosuid flag.
Pros and Cons
A
Jail roots versus containers versus vm
Jail-root versus VM
Do you think some virtualization concepts were taken from the chroot jail, which Unix and Linux have been using for ages ?# Google Bard's answer:
Yes, I think some of the virtualization concepts are taken from chroot jail. Chroot jail is a technique that restricts a process to a specific directory tree. This can be used to create a secure environment for running a process, or to isolate a process from the rest of the system.
Virtual machines (VMs) are a more sophisticated form of virtualization that allows multiple operating systems to run on the same physical hardware. VMs do this by creating a virtual machine monitor (VMM) that sits between the hardware and the operating system. The VMM creates a virtual environment for each operating system, which includes its own CPU, memory, and file system.
The chroot jail concept is used in VMs in a few ways. First, the chroot system call is used to change the root directory of the VM. This means that the VM can only access files and directories that are located within its root directory. Second, the VMM can create a chroot jail for each VM. This allows the VM to be isolated from the other VMs and from the host system.
So, yes, I think some of the virtualization concepts are taken from chroot jail. Chroot jail is a simpler form of virtualization, but it provides some of the same benefits. VMs are more powerful and flexible, but they also require more resources.
From https://www.linkedin.com/pulse/unlocking-power-chroot-jail-linux-journey-security-crucis-jimenez
Jail-root versus VM
# Google Bard's answer:
Here are some of the specific virtualization concepts that are taken from chroot jail:
Resource isolation: Chroot jails can isolate processes from each other and from the rest of the system. VMs can also isolate operating systems from each other and from the host system.
Security: Chroot jails can be used to create secure environments for running processes. VMs can also be used to create secure environments for running operating systems.
Portability: Chroot jails can be used to run processes on different systems. VMs can also be used to run operating systems on different systems.
(From https://www.linkedin.com/pulse/unlocking-power-chroot-jail-linux-journey-security-crucis-jimenez )